Ableton Live Workshop
Déifferdenger Museksschoul 2022
Ableton: Make It Your Own
Laurent Peckels & Sebastian Schlapbe Flach
Laurent Peckels & Sebastian Schlapbe Flach
Each of these topics can easily and entire or even several sessions. We will give you and overview of the main features in Ableton.
This website contains original material and links to websites and other resources. All the topics covered are referenced here and the website replaces the usual powerpoint presentation with a format more adapted to a workshop about Ableton. The following pages can be printed out (but why would you?). The site is adaptive and can be viewed on mobile devices, navigation by keyboard shortcuts is active (try ) and search is enabled.
Many great tutorials are available and due to the fast pace of the technological evolution it’s best to also look for info on the latest updates. The first workshop is dedicated to give an overview of Ableton and the new course introduced in Luxembourg on “Création musicale assistée par ordinateur” a barbaric name used to describe the whole digital music production chain.
The address of this site: abletonworkshop.netlify.app will remain active and the content updated for the next sessions. Text and code references can be copy-pasted with the icon.
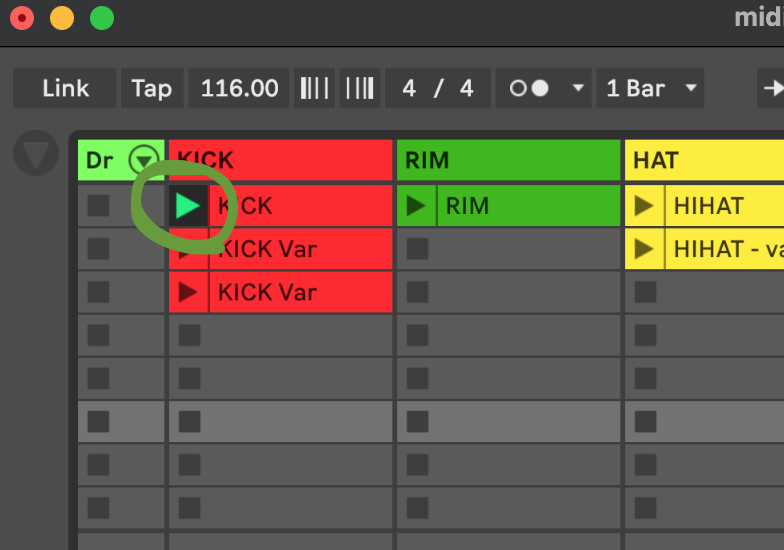
Please download the first archive file midiclip starter Project.zip and open it in Ableton Live.

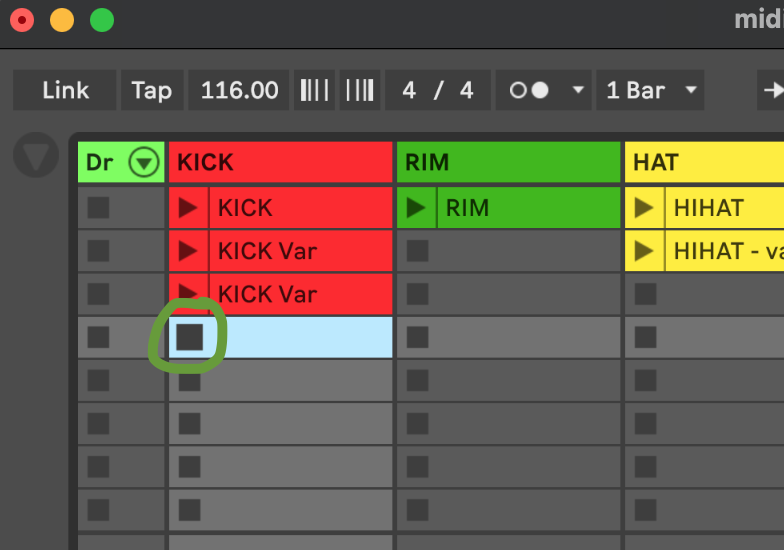
Play around with starting and stopping clips (parts):
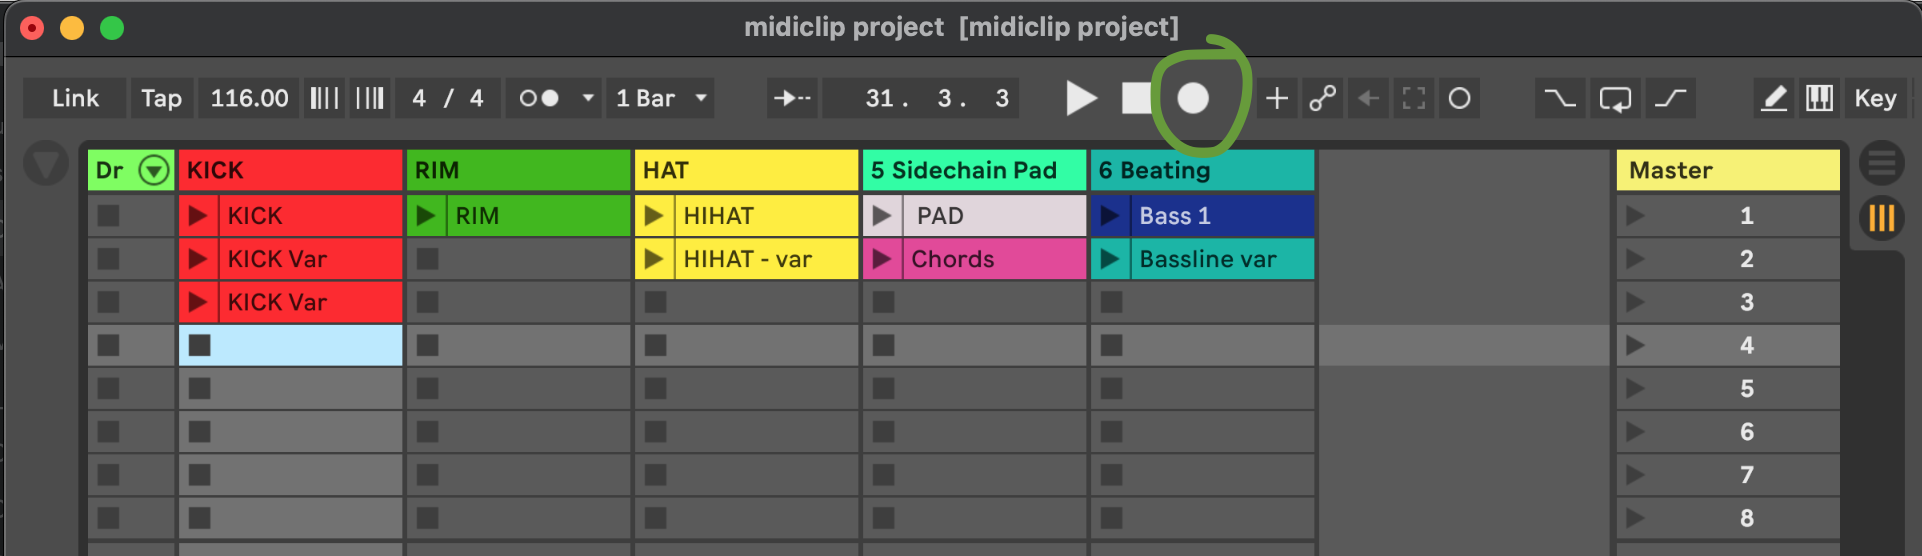
When you found an order you liked, press the Session record button and do a performance:
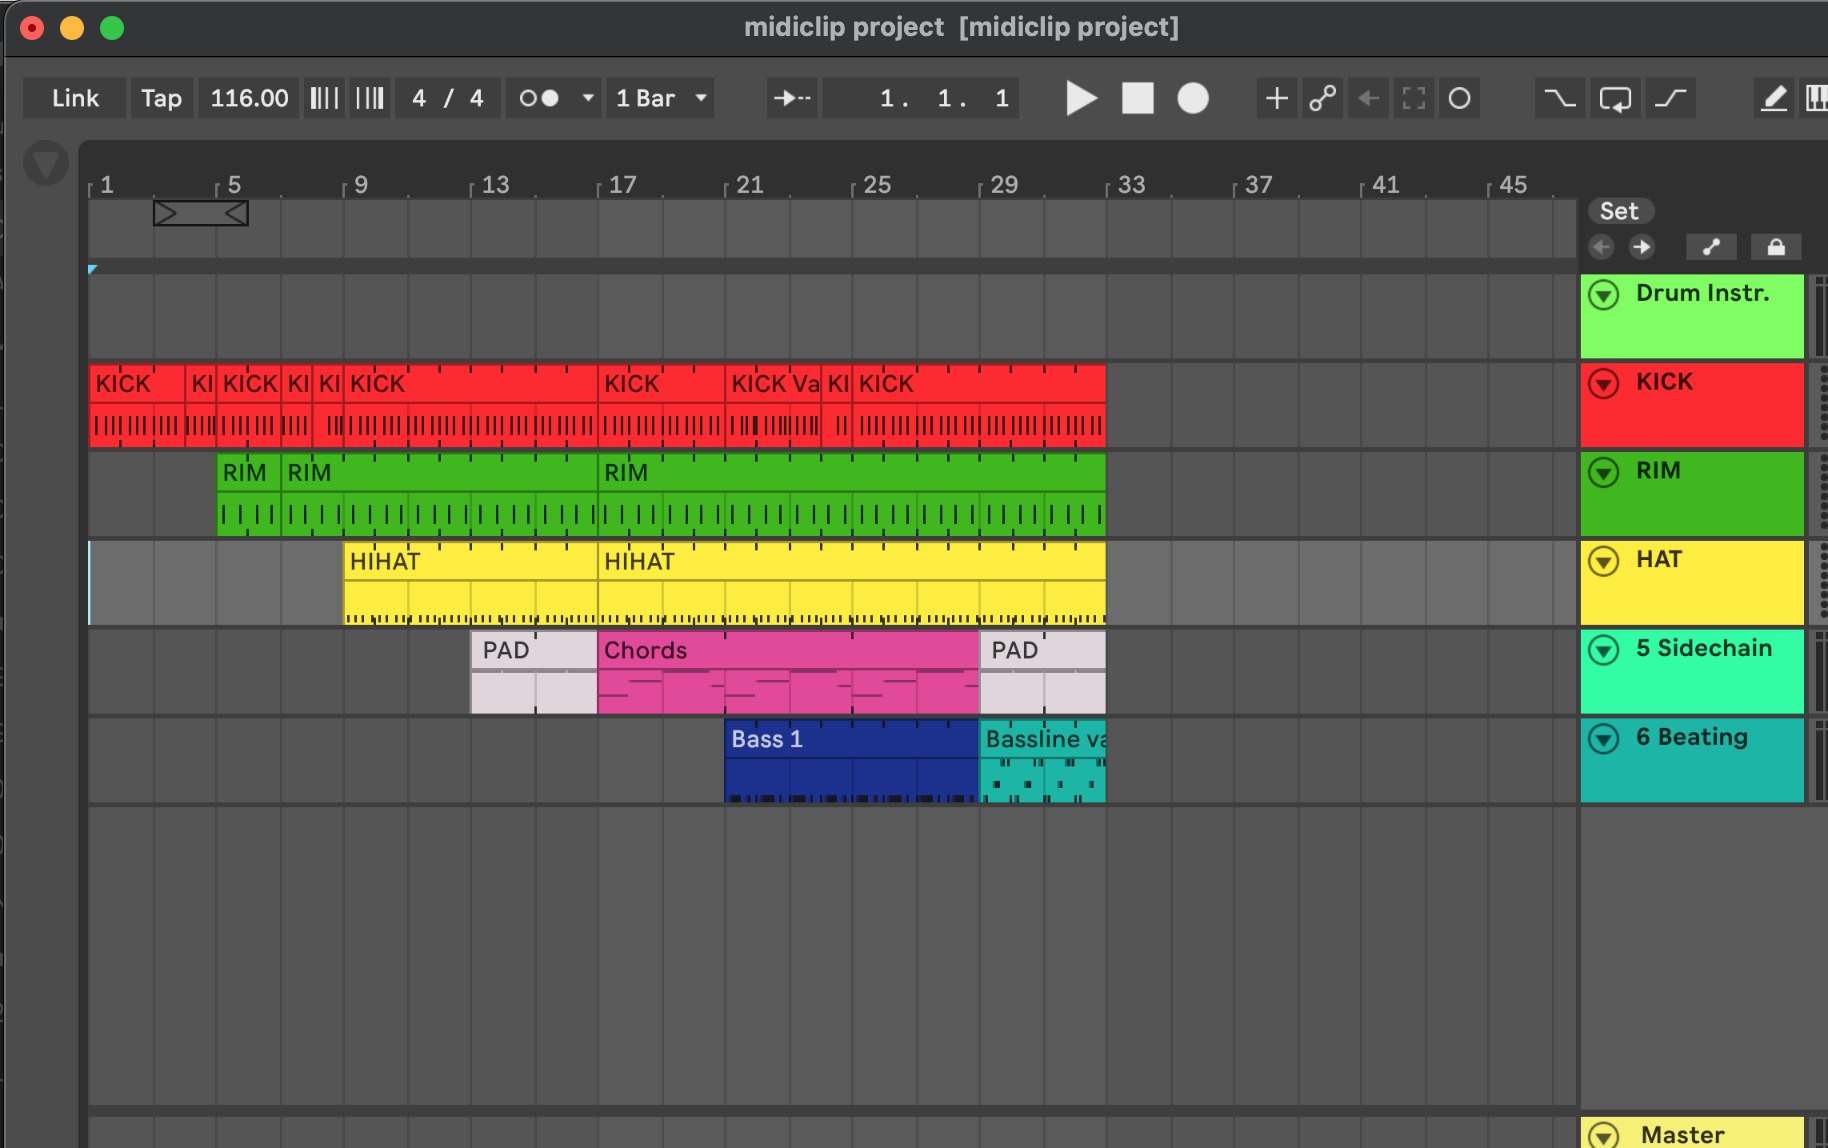
Let’s move on and have a look at the arrangement view where your performance was recorded:
One of the most usefeul shortcuts in Ableton is the tab marked ⇥ on your keyboard. It allows you to quickly cycle between session and arrangement view.
Switch to arrangement view by using the tab key ⇥ to see the result of your performance.
Click the Back to Arrangement icon (F10) to
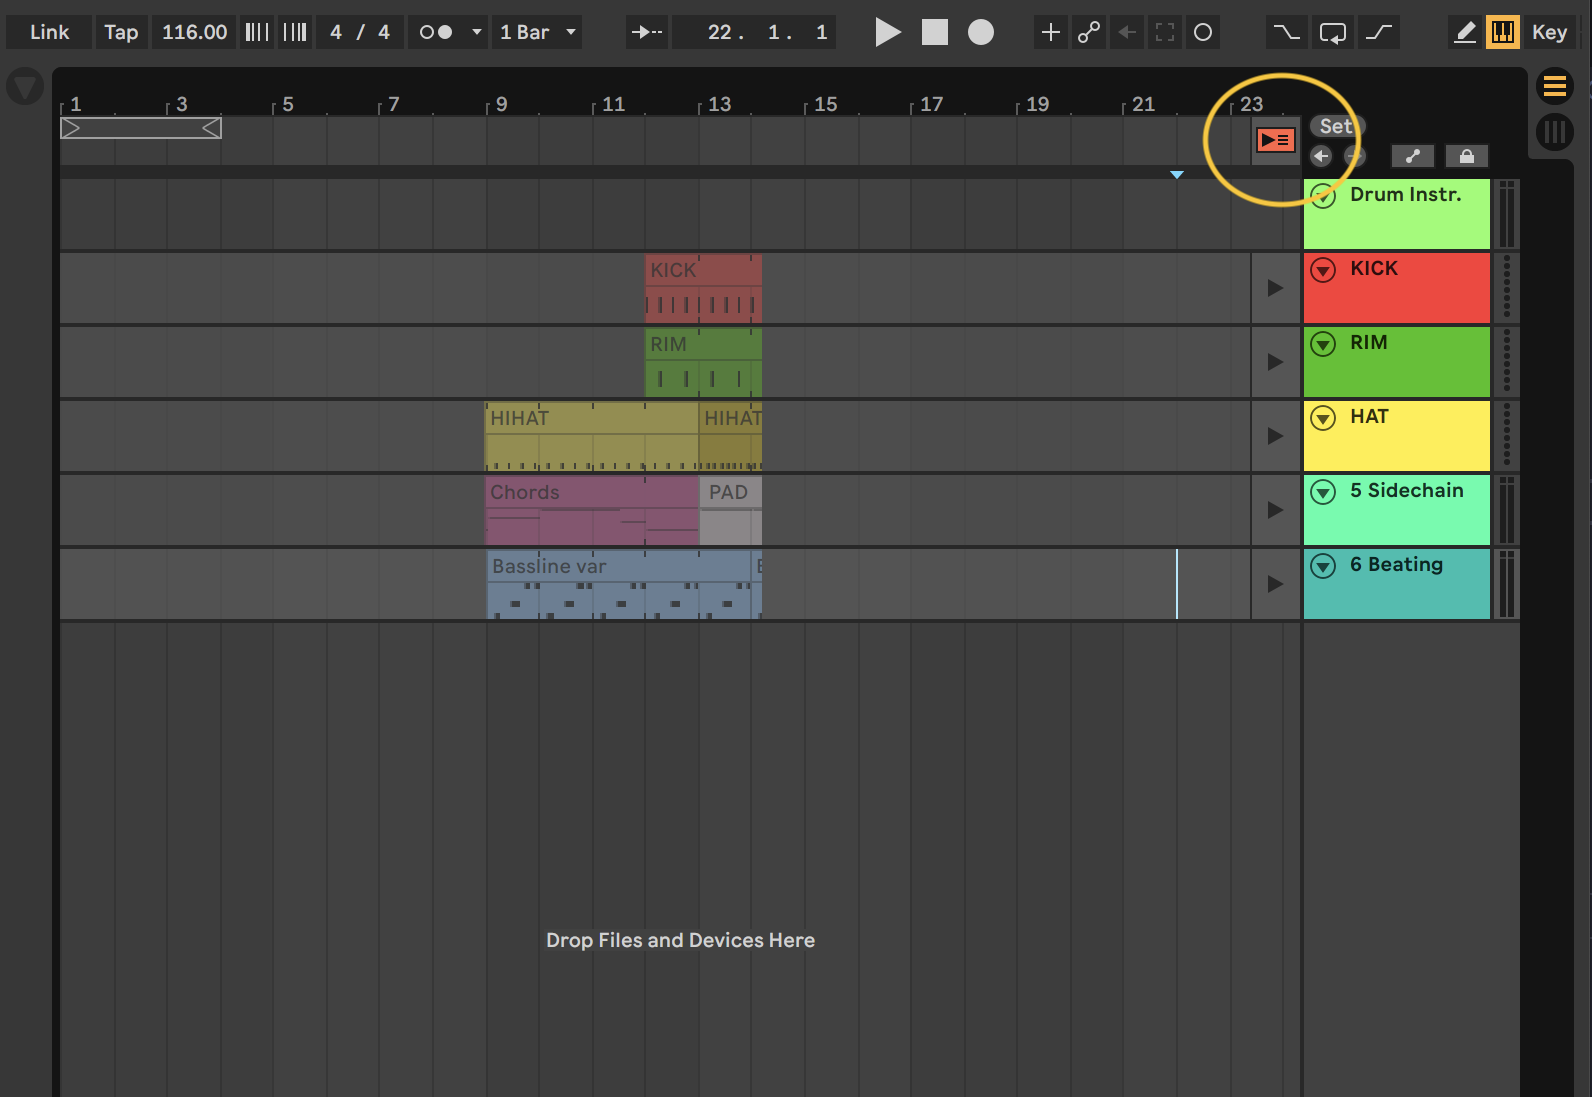
“Arrangement playback does not resume until you explicitly tell Live to resume by clicking the Back to Arrangement button, which appears in the Arrangement View and lights up to remind you that what you hear differs from the Arrangement.” (cf. manual Recording Sessions into the Arrangement)
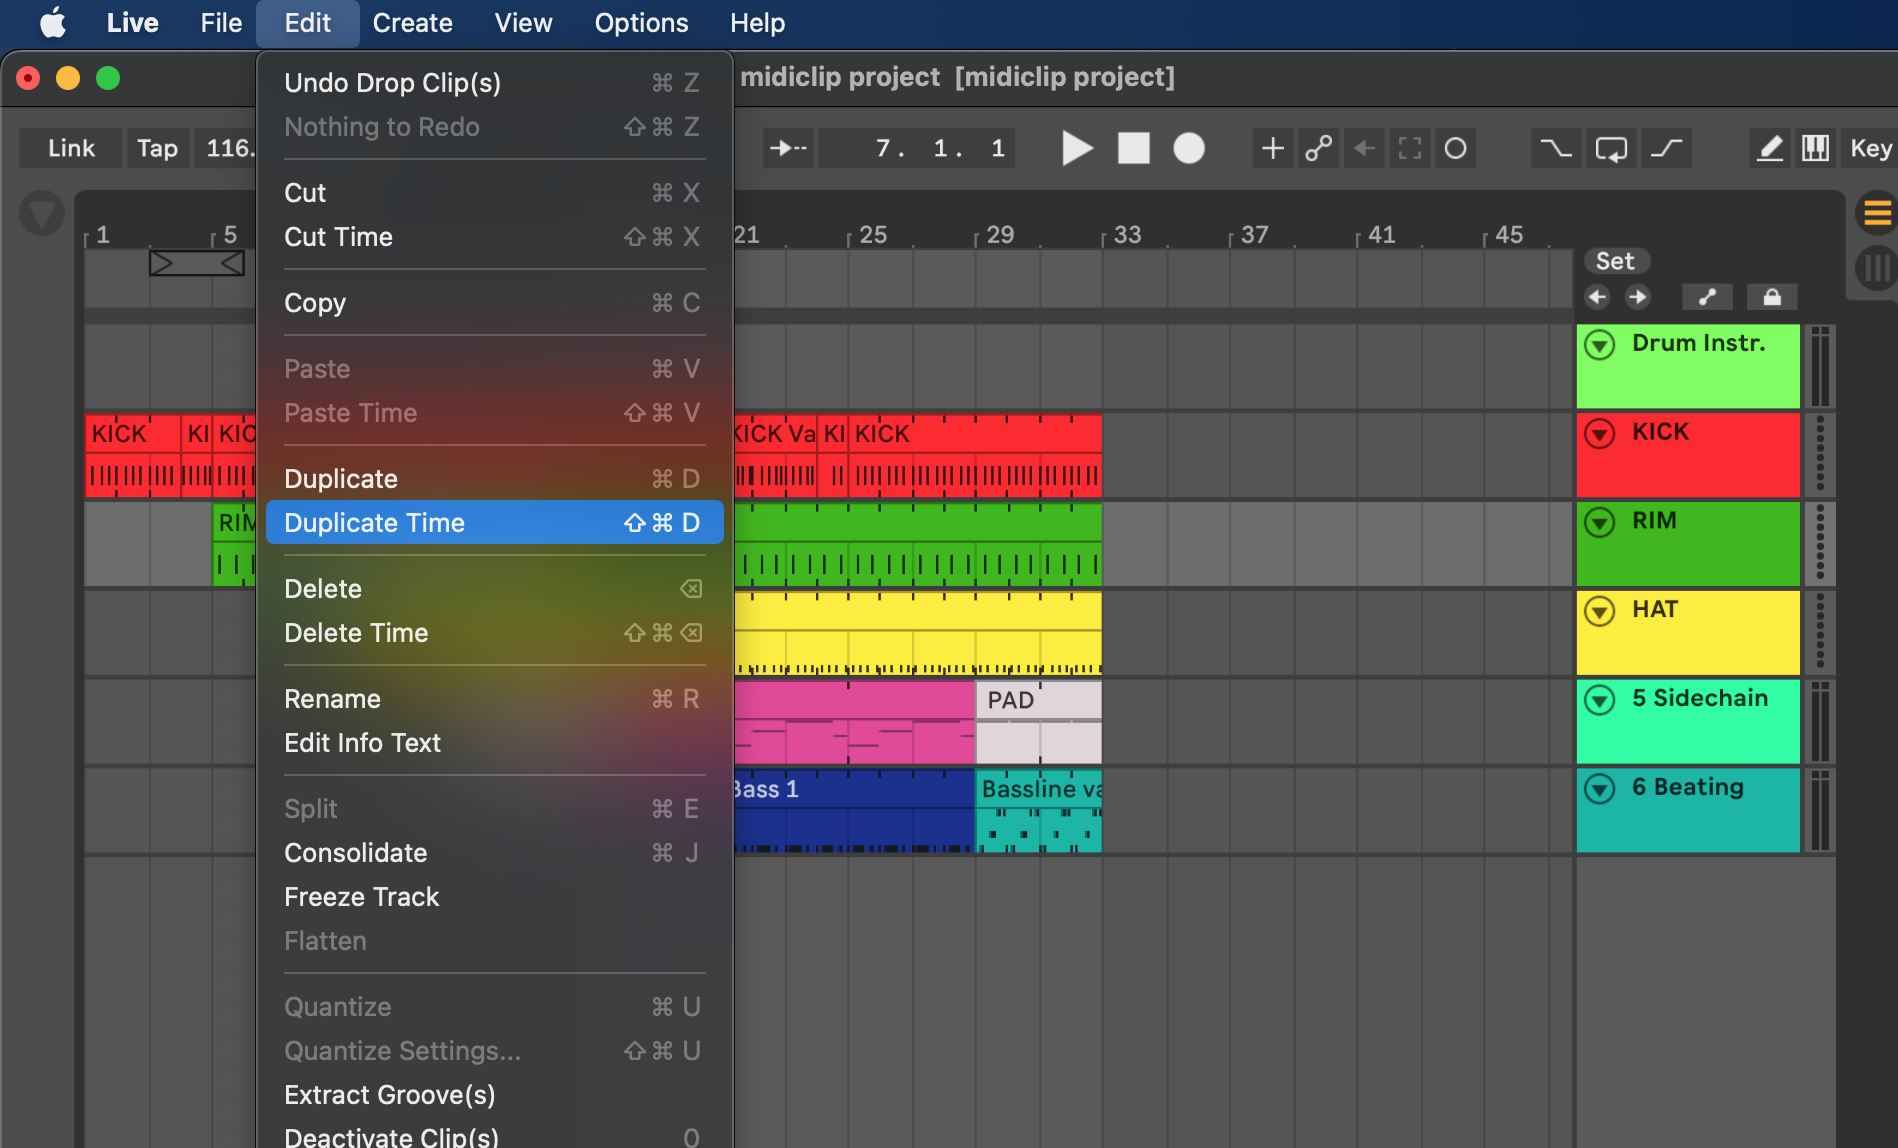
You can edit the lengths of the individual loops by simple grabbing and dragging the edges of the parts.
You can also select multiple parts and change them all at once.
To lengthen a part use Edit -> Duplicate Time to duplicate the selection and move everything to the right. (Insert Edit)
You can also do the opposite: select a region, use Delete Time and everything will move to the left.
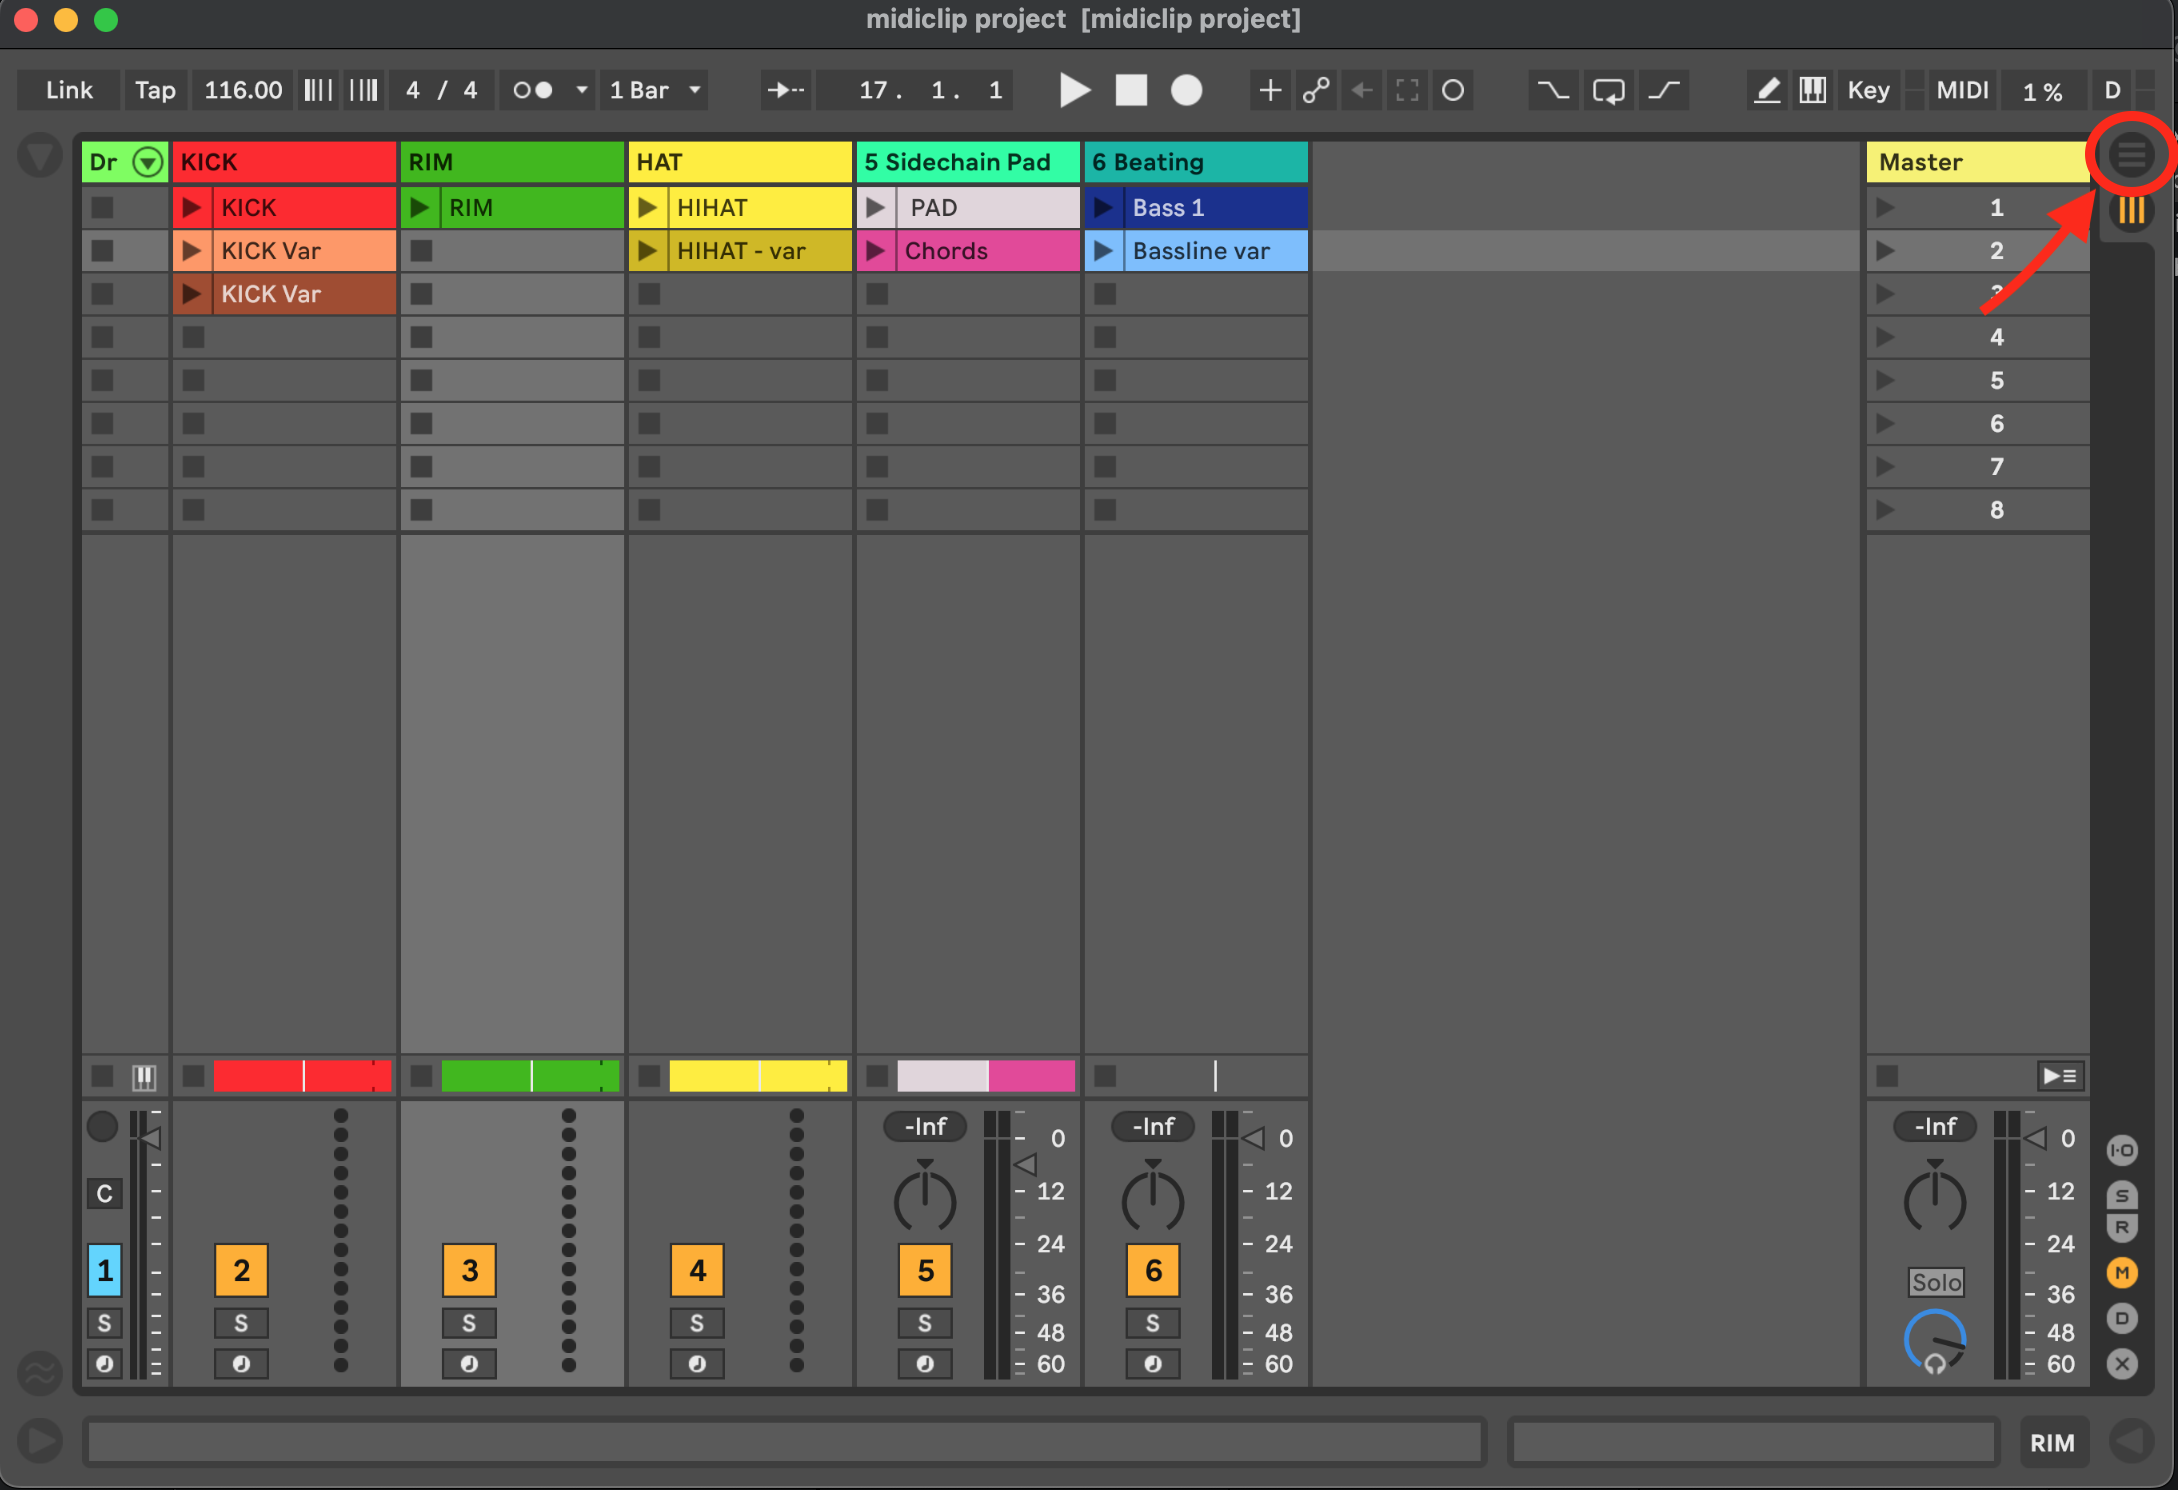
Let’s a have a quick tour of some of the elements of the user interface:
Top Row:
arrows to open and close
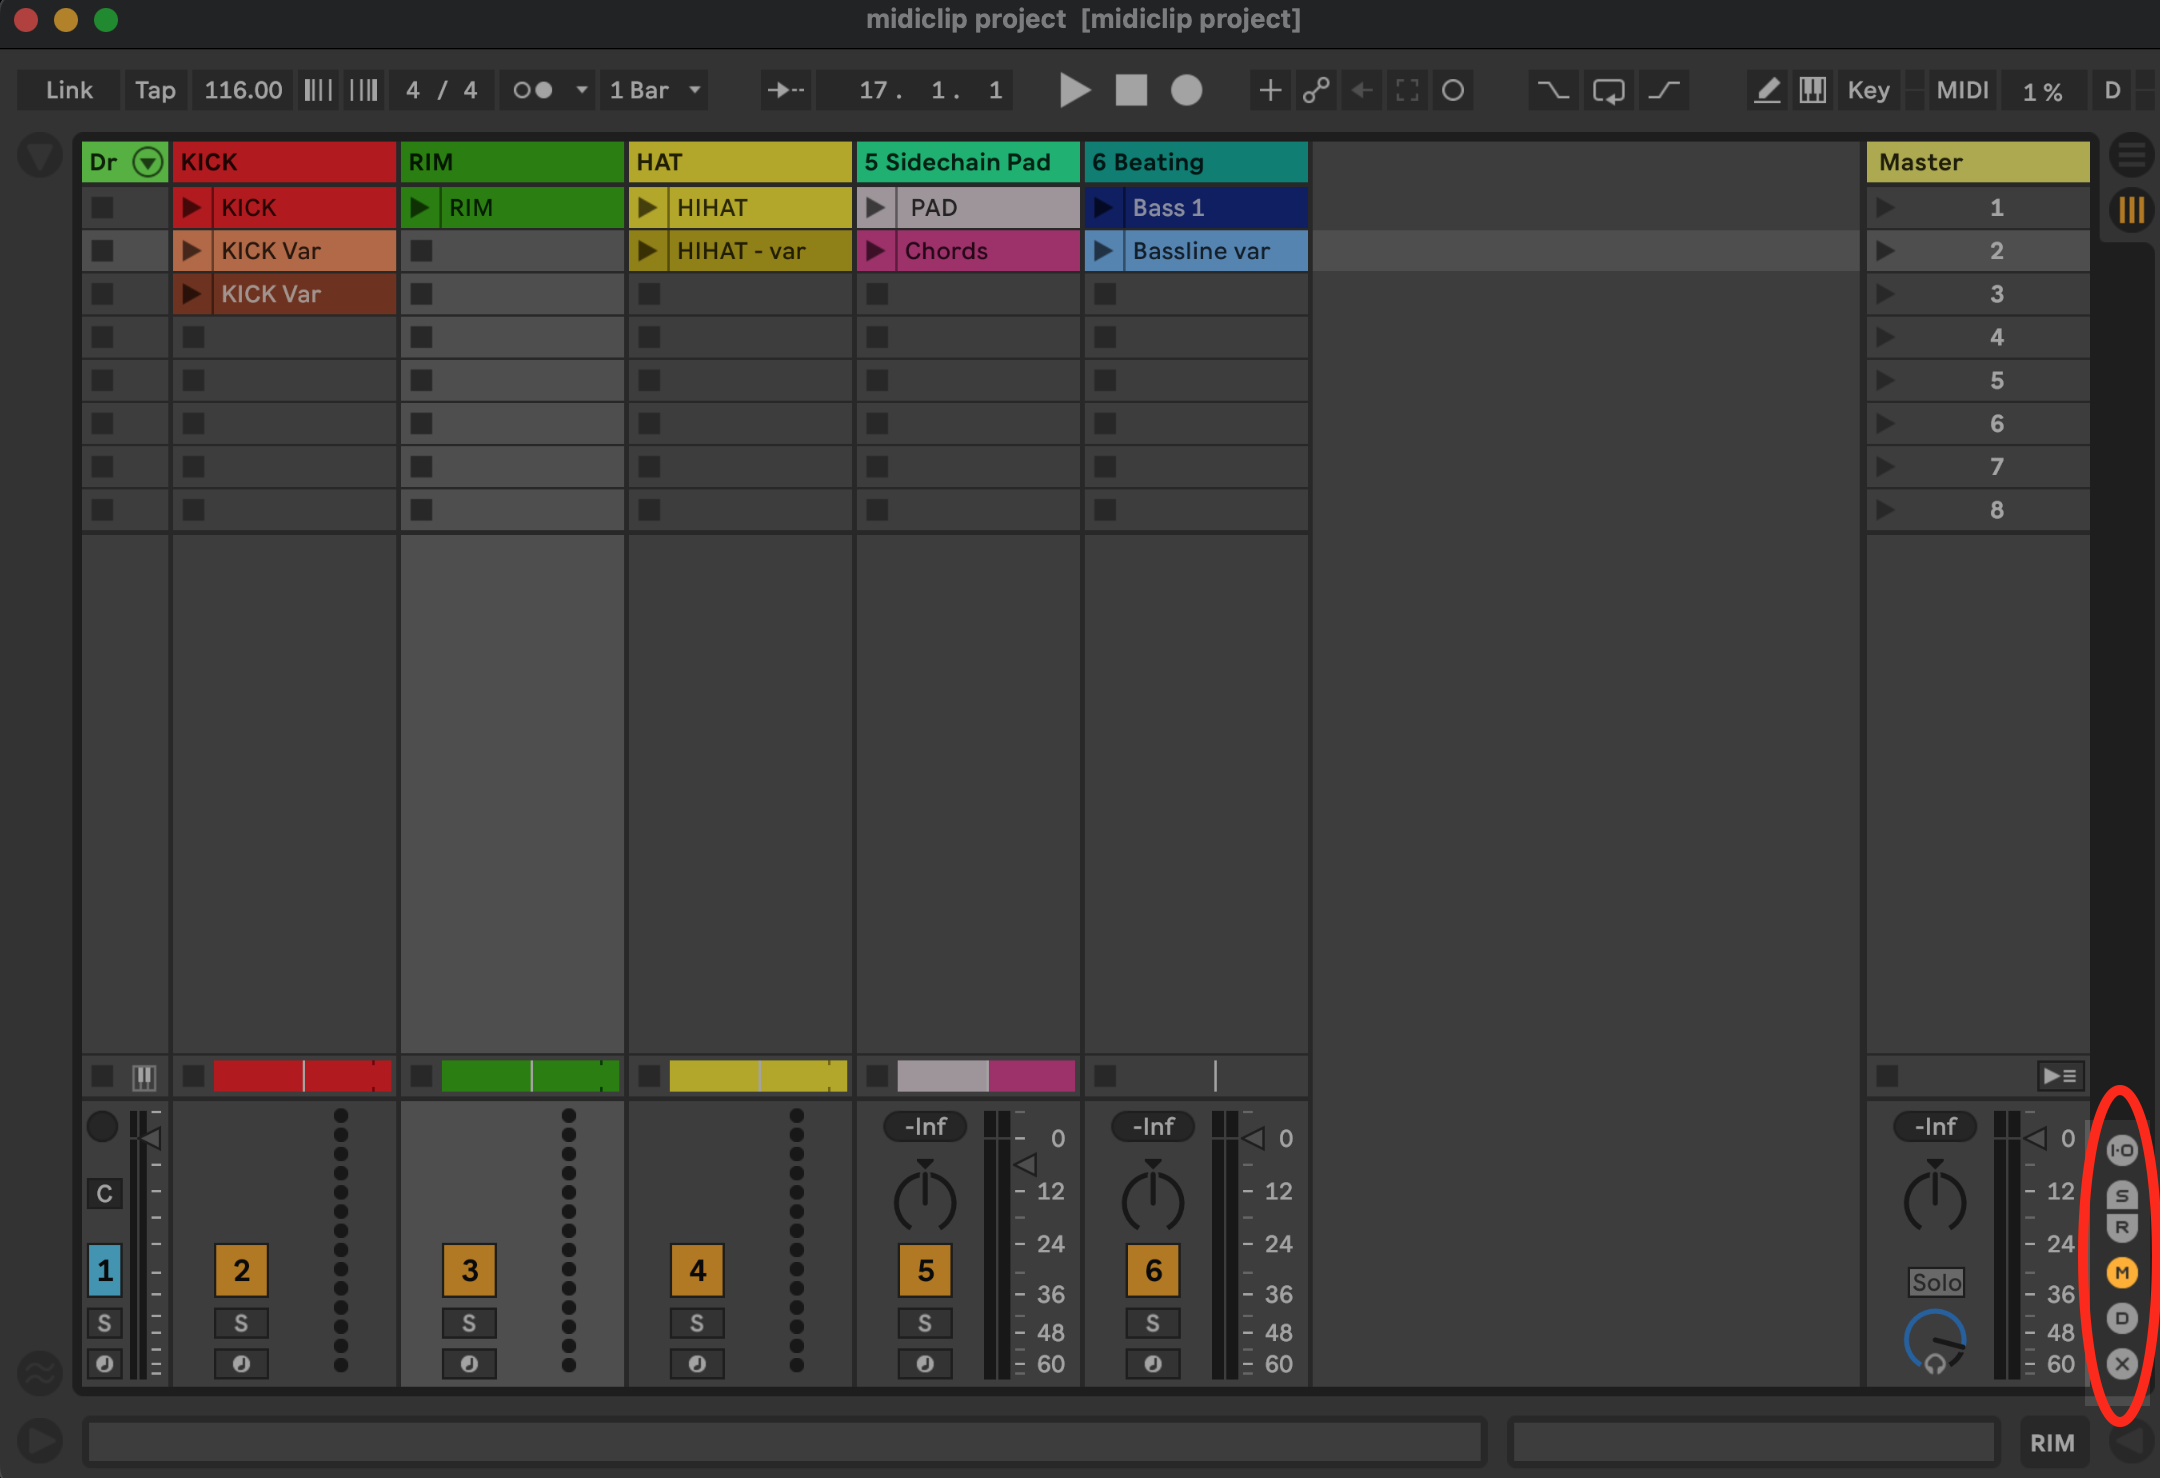
Device / Clip View (Bottom right)
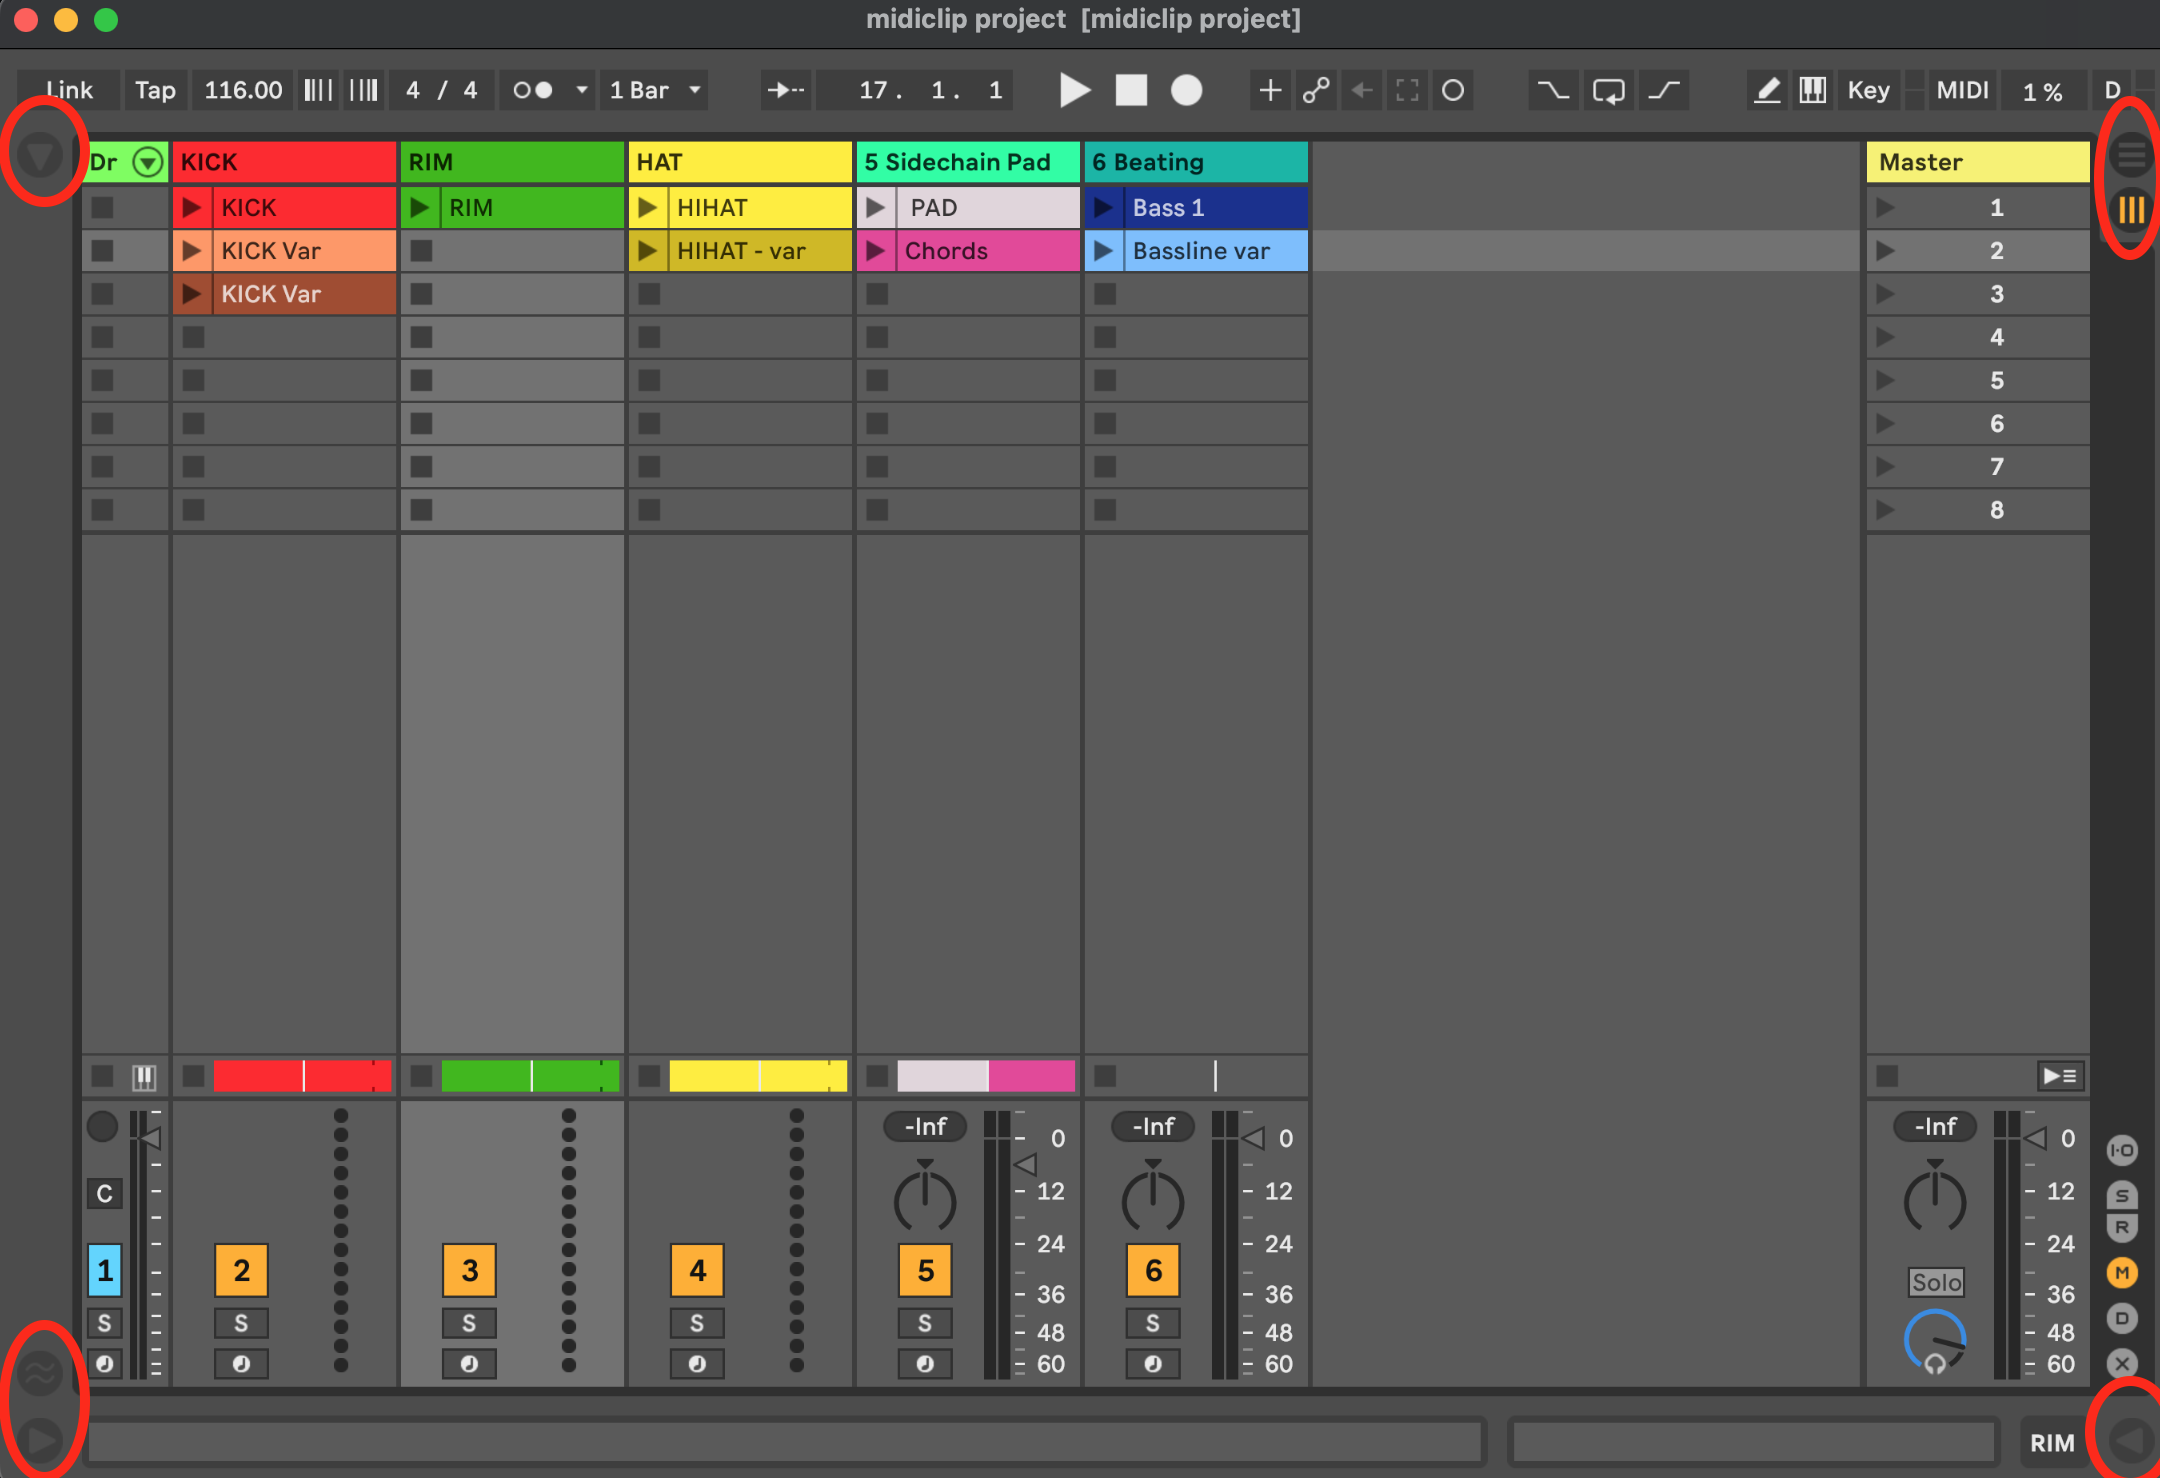
Show / Hide Mixer Elements:
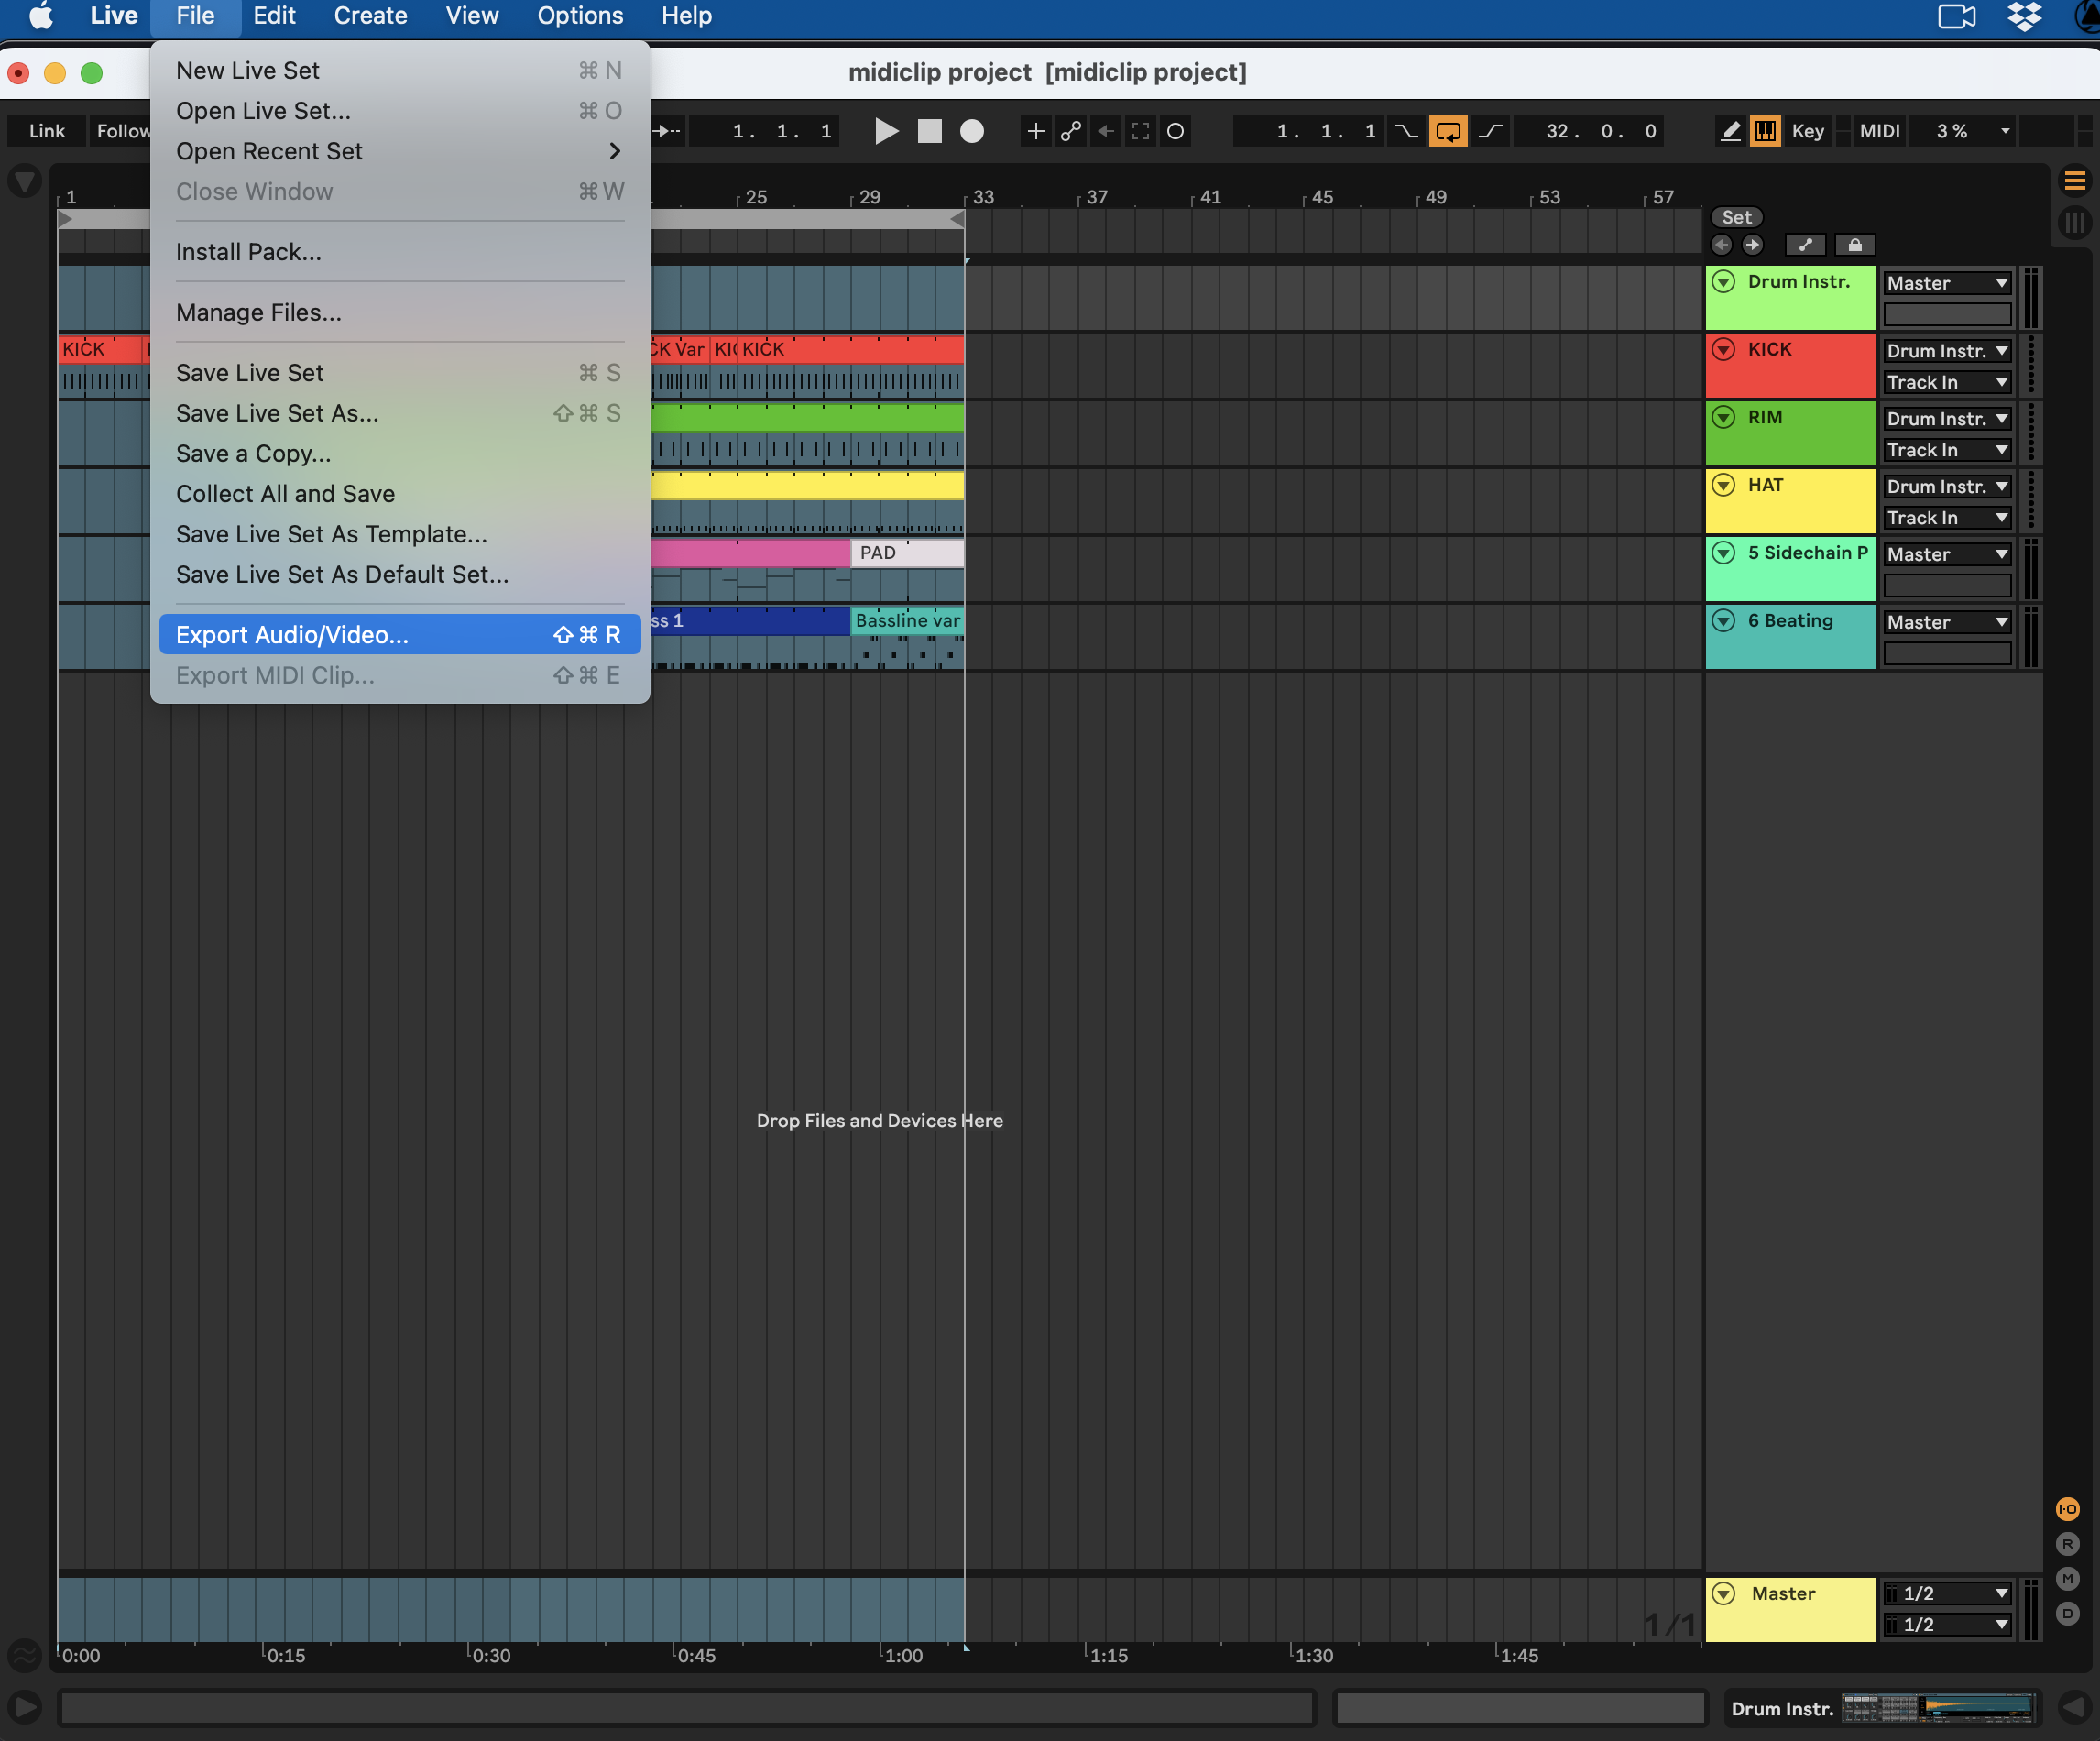
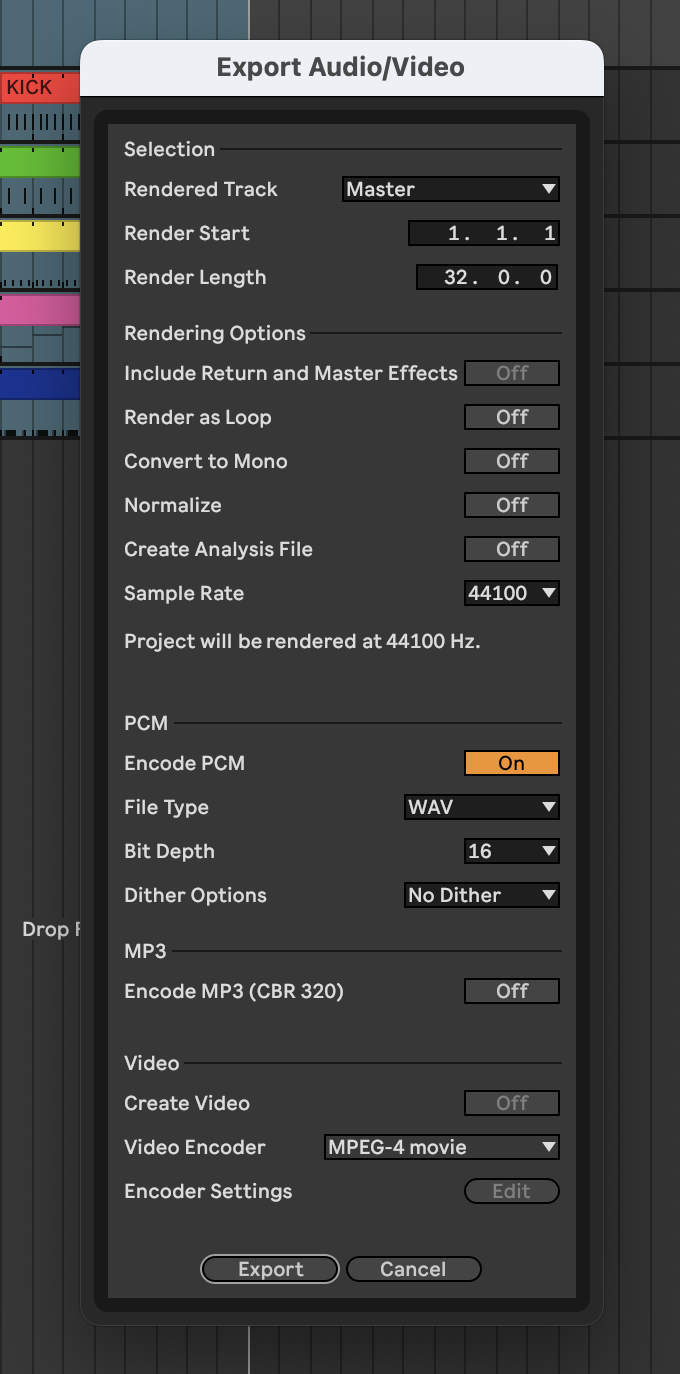
Position the loop brace to determine the beginning and end of the export and don’t forget to click it.
The Ableton manual dives into every aspect of recording new clips in the session view and the arrangement view. Three steps are necessary for recording midi or audio1 clips:
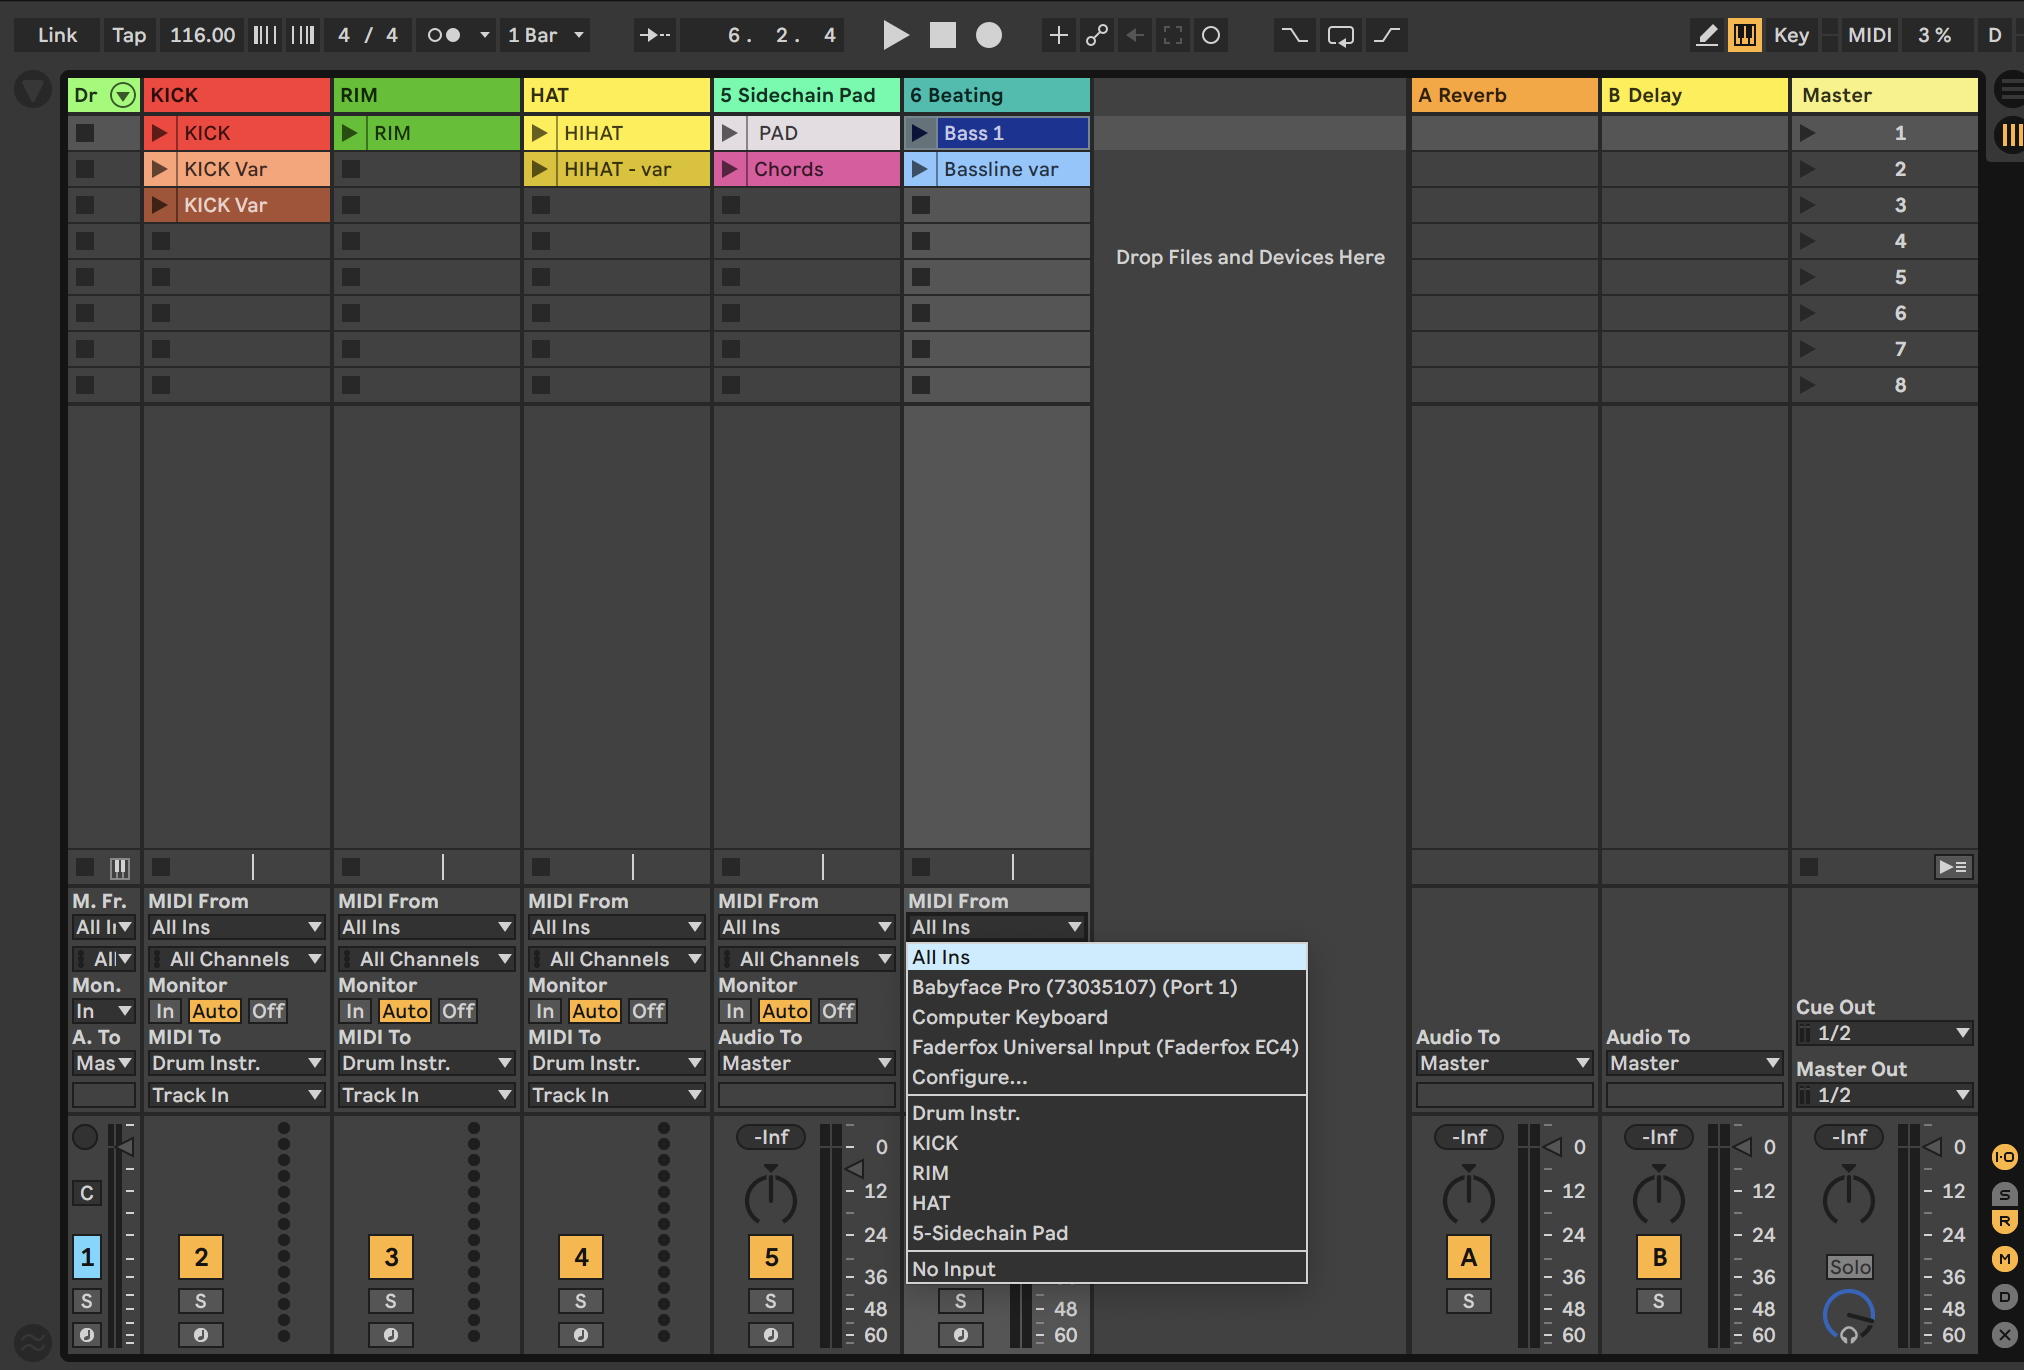
We will illustrate the process of recording midi clips in the session view (ableton calls this recording into session slots).
On track 6 click on midi from. for now leave it on all ins.
Instead of using the stop button in the control bar you can also press the clip stop button.

You should now have recorded your first midi clip into a slot but it’s very likely that some unexpected things happened (clip went into play mode, record started immediately with no count-in, etc.). This is a good example of how software aims at making the user perform a series of steps while also giving him the freedom to find his own approach. Check the linked video below on how an official Ableton video shows a different approach on how to record clips then the manual pages.
Q W EA S D FC VZ XActivate with the Computer MIDI Keyboard button:

Play something on a record armed track without starting the main record button or a clip record butoon, then click on the capture button:

For a quick reference on further options:
For an overview of music formats please refer to computer audio basics on musescore.peckels.com. ↩︎
The Ableton Manual offers a precise overview for recording in arrangement view (introduces it before session view) and suggests a workflow (after the 3 first basic steps: chose an input, arm, record).
Please refer to the following topics for a deeper look in audio recording in Live:
Also consider this knowledge base post on how to reduce latency and an article by Focusrite, manufacturer of the well known Scarlett usb audio card range, Latency Issues with Interfaces
For a basic audio recording process follow these steps:

(Demo) Please follow the steps for your specific sound card and setup and refer to this chapter Monitoring in Live:
“Monitoring means that you’re receiving a signal from an input source (which could be an audio input on audio tracks, or a MIDI input on MIDI tracks), processing it with effects (if required), then passing that signal to the track’s output where you can listen to it on your speakers or headphones.”
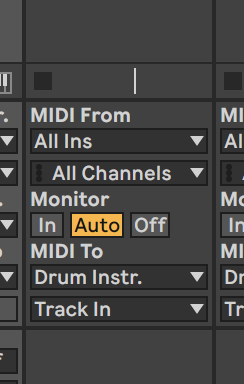
When should the monitor be set to “In” or “Auto”?
- If you prefer to monitor through Live.
- If you want process the monitored signal with effects while playing back/recording.
- If you have no other way to monitor (no interface with direct monitoring, no external mixing desk).
When should the monitor be set to “Off”?
- If you’re using direct monitoring. Direct monitoring is a function of certain audio interfaces
- If you’re monitoring through an external mixing desk.
- If you can hear the source already without a need for monitoring (eg. an acoustic guitar or your voice).
- If you’re monitoring the source already through another track in the Live set, and are recording the same signal to a separate track. For example when working with external hardware and recording the audio directly to another track.
Also cf. What is direct monitoring? on the magic between software monitoring and direct, latency free monitoring on a Scarlett Solo or 2i2 card.
Explore the control bar options (besides the record and stop button 😺):

 the
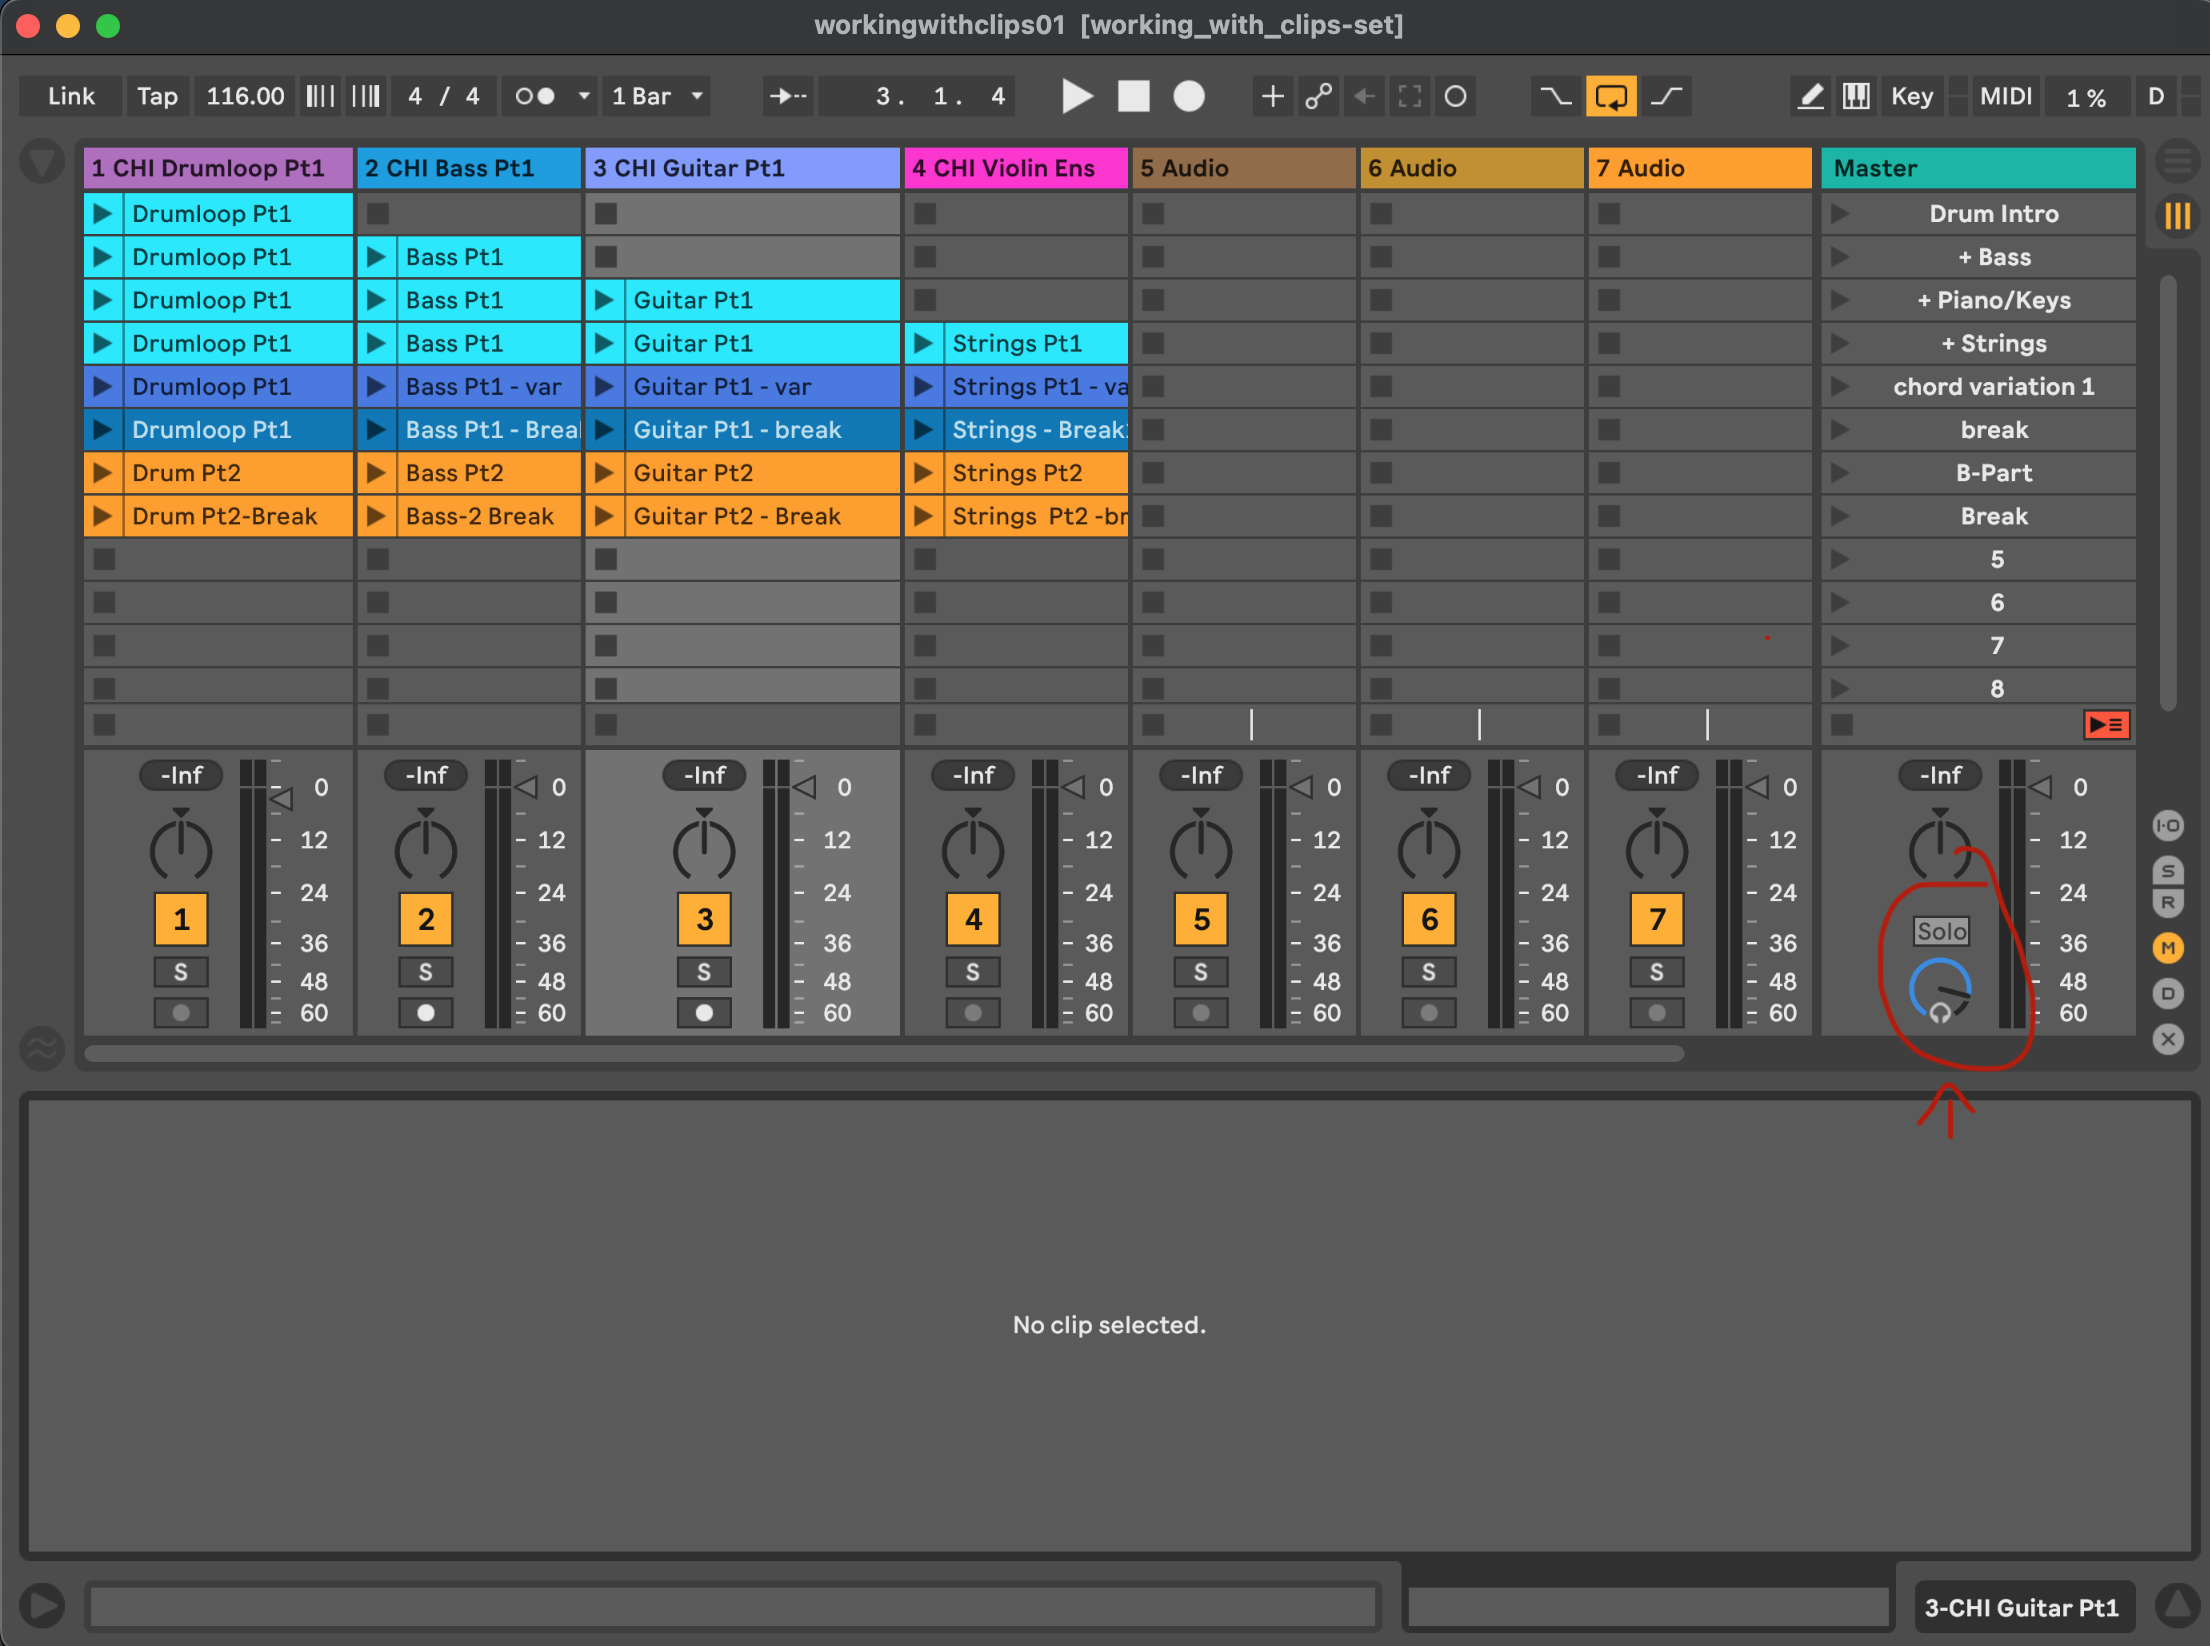
the Arrangement LoopIn this part we will have a look at how to add new clips to the set and how to manipulate them.
Download and open the following Ableton live set:
working with clips ableton set
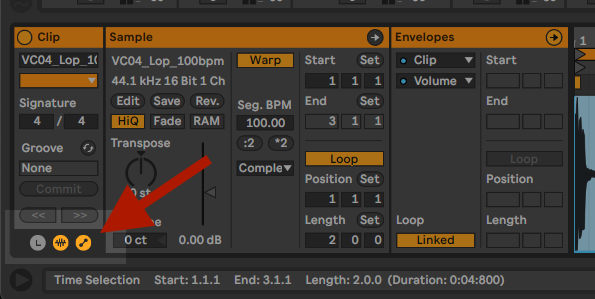
When you click on a loop, ableton will play the sample in the tempo of the song and quantized to the beginning of the next bar. This is called warping. you can turn it off(and on) here:

you can adjust the volume of the preview here:
If you listen to a loop you like to add, simply drag and drop it onto an audio track or onto a blank area. A new audio track will be created.
you can easily adjust the start end position of a loop. There are several ways to do this:
You drag the looping marker in the sample area:
you can also select an area and press cmd-L (or look for the command in the edit menu):
or you can type or change the values in the Start-End - Loopposition-Length section:

e.g. you have a drum loop sample where you really like the sound of the backbeat, but you don’t want to have the whole beat playing. That is a great example of how you can use clip envelopes.
B
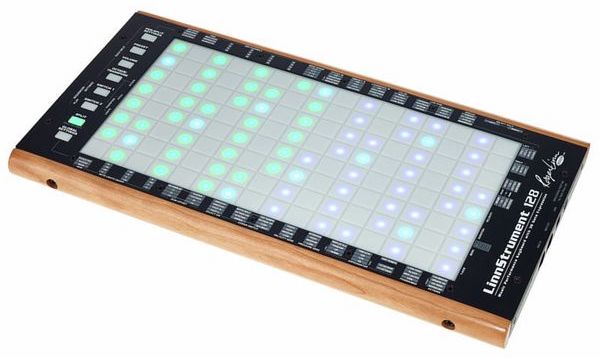
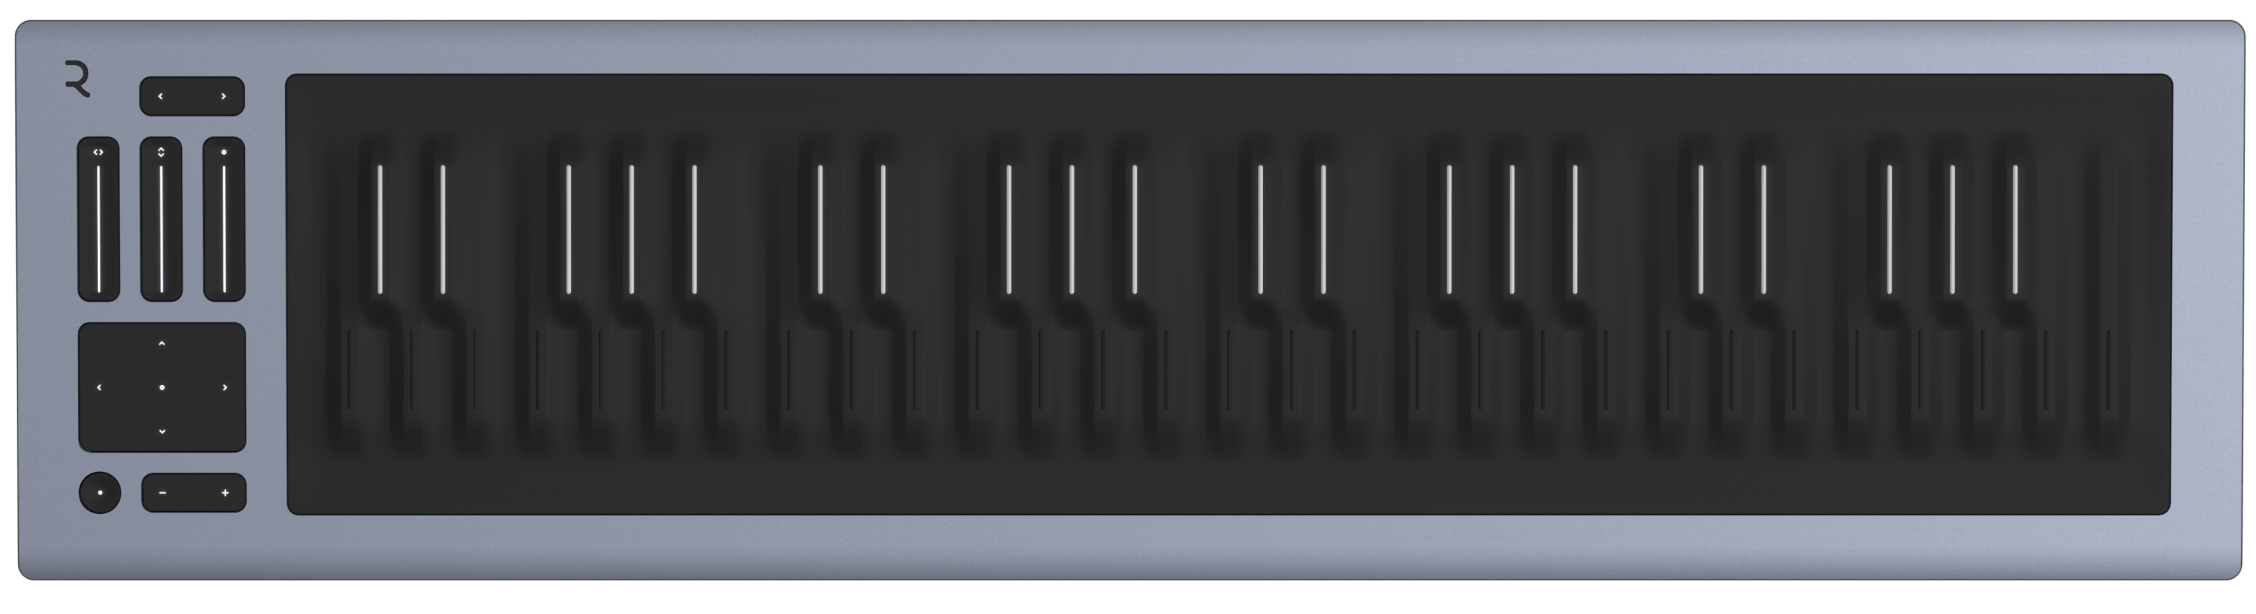
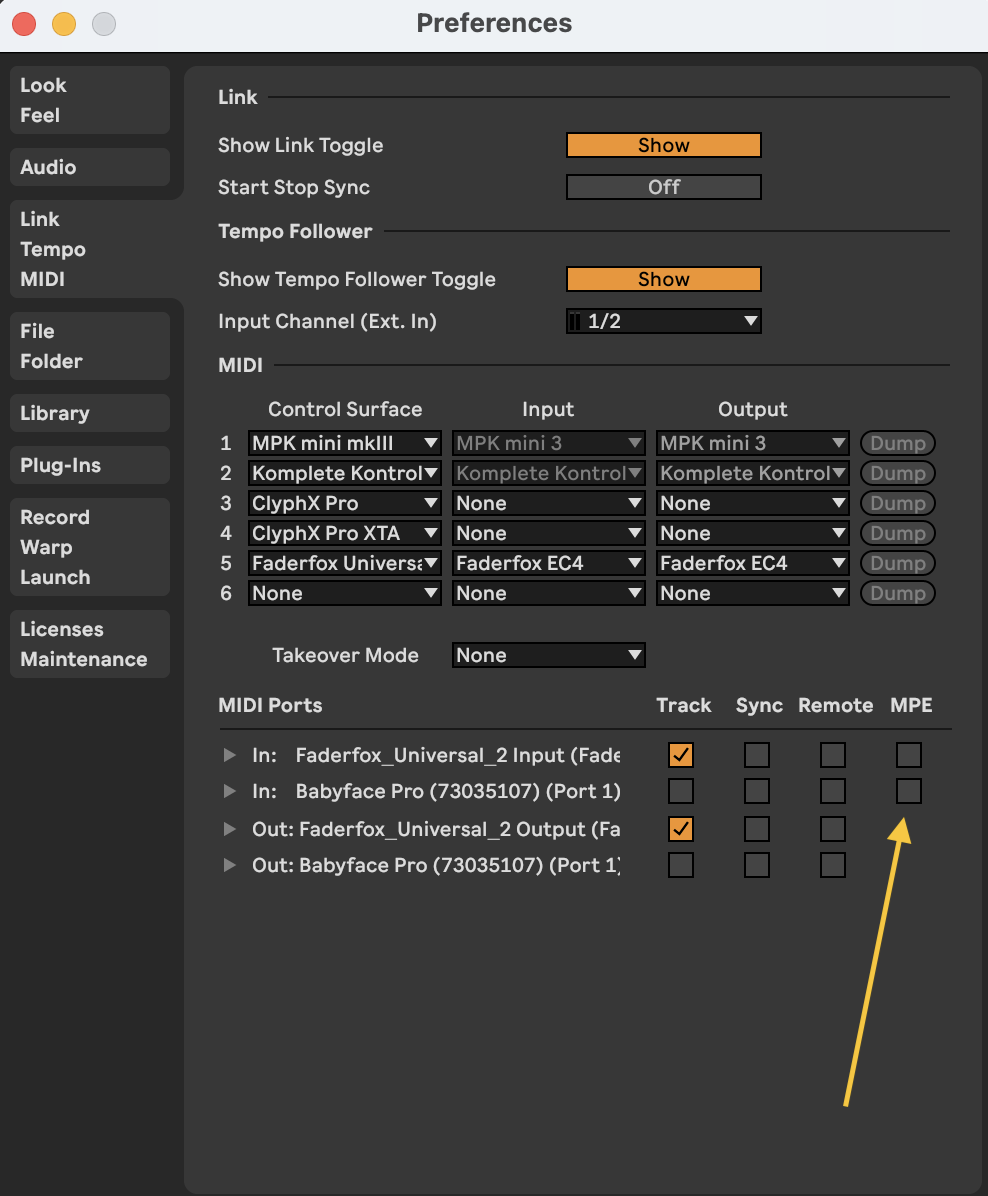
Live 11 finally introduced MPE. MIDI Polyphonic Expression (MPE) and Midi are both standard protocols containing note and time information. MIDI associates all parameters of data to a single channel, MPE does this with each note. Every note can have its values changed in realtime.
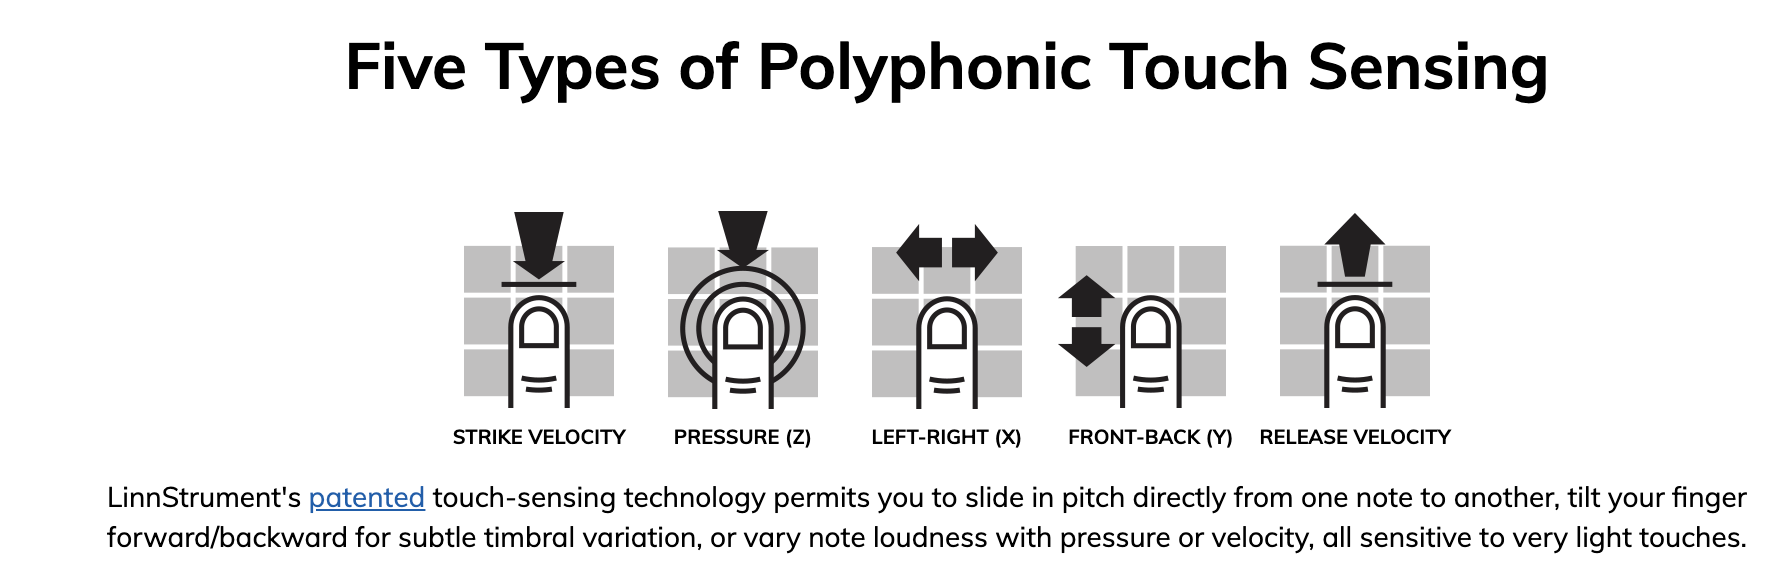
MPE is a new specification based on MIDI, the universal protocol for electronic music. MPE allows digital instruments to behave more like acoustic instruments in terms of spontaneous, polyphonic sound control. So players modulate parameters like timbre, pitch, and amplitude — all at the same time. roli.com/mpe
The Linnstrument and the Roli Seaboard Rise Keyboard are of part of this new generation of midi keyboards:
Use Live/Preferences then link tempo midi to activate the MPE for a compatible keyboard:
See Slice to New MIDI Track in the Ableton Manual.
“This command divides the audio into chunks which are assigned to single MIDI notes.”
(N.B.: This only works on warped clips!)
Ableton Sampling Tutorial in Simpler – Slicing Samples
Example of remixing a film with sample slices. Here Plan 9 from Outer Space by Ed Wood who also used stock music out of budget constraints:
This Live feature opens the door to using midi controllers and keyboards and creating your own instrument. Learn Live 10: MIDI mapping and key mapping
Use cmd + K to access keyboard mapping and cmd + M for midi mapping. (ctrl on Windows)
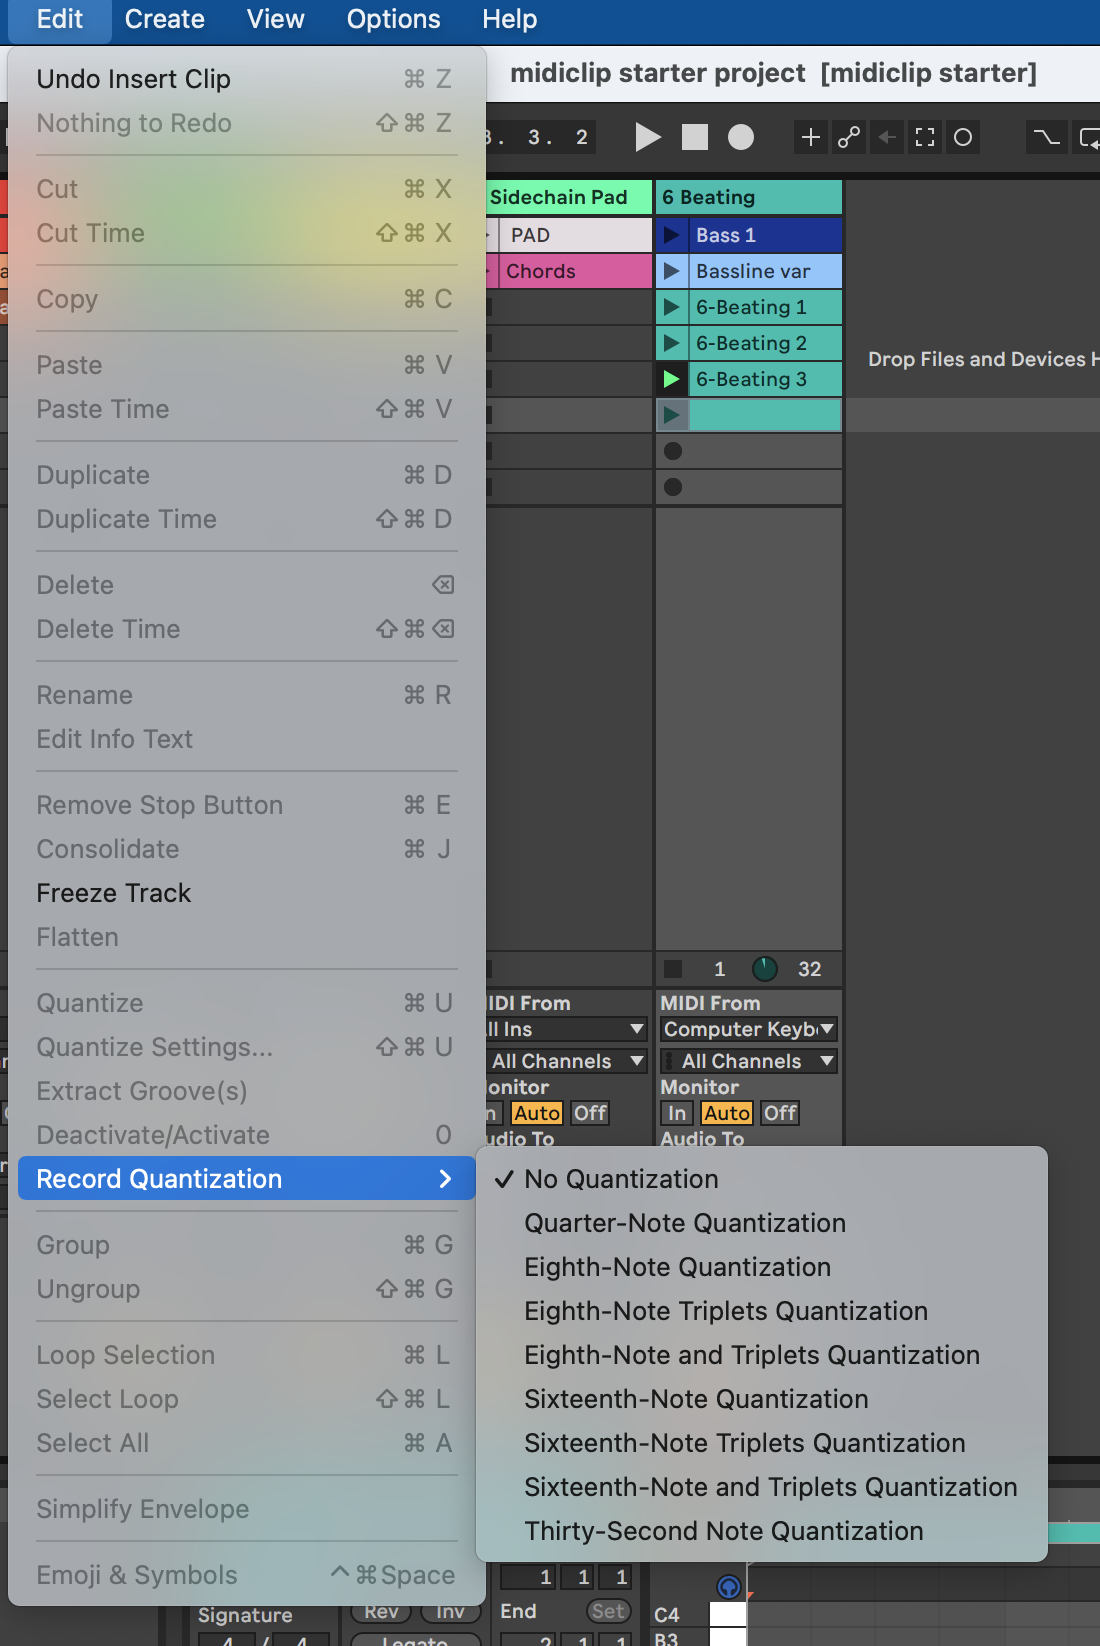
Often overlooked but key to humanize rigid midi playback. To access them:
To apply them:
“The timing and “feel“ of each clip in your Set can be modified through the use of grooves. Live comes with a large selection of grooves, which appear as
.agr” files in the browser. (Using Grooves)
One of the essentials features of Live with many (too many?) tutorials available:
A very personal selection of shortcuts, cf. Live Keyboard Shortcuts for a complete list.
| Shortcut | Description |
|---|---|
| shift + tab | toggle clip device view |
| Shortcut | Description |
|---|---|
| F10 | back to arrangement |
| cmd + L | LOOP selection! |
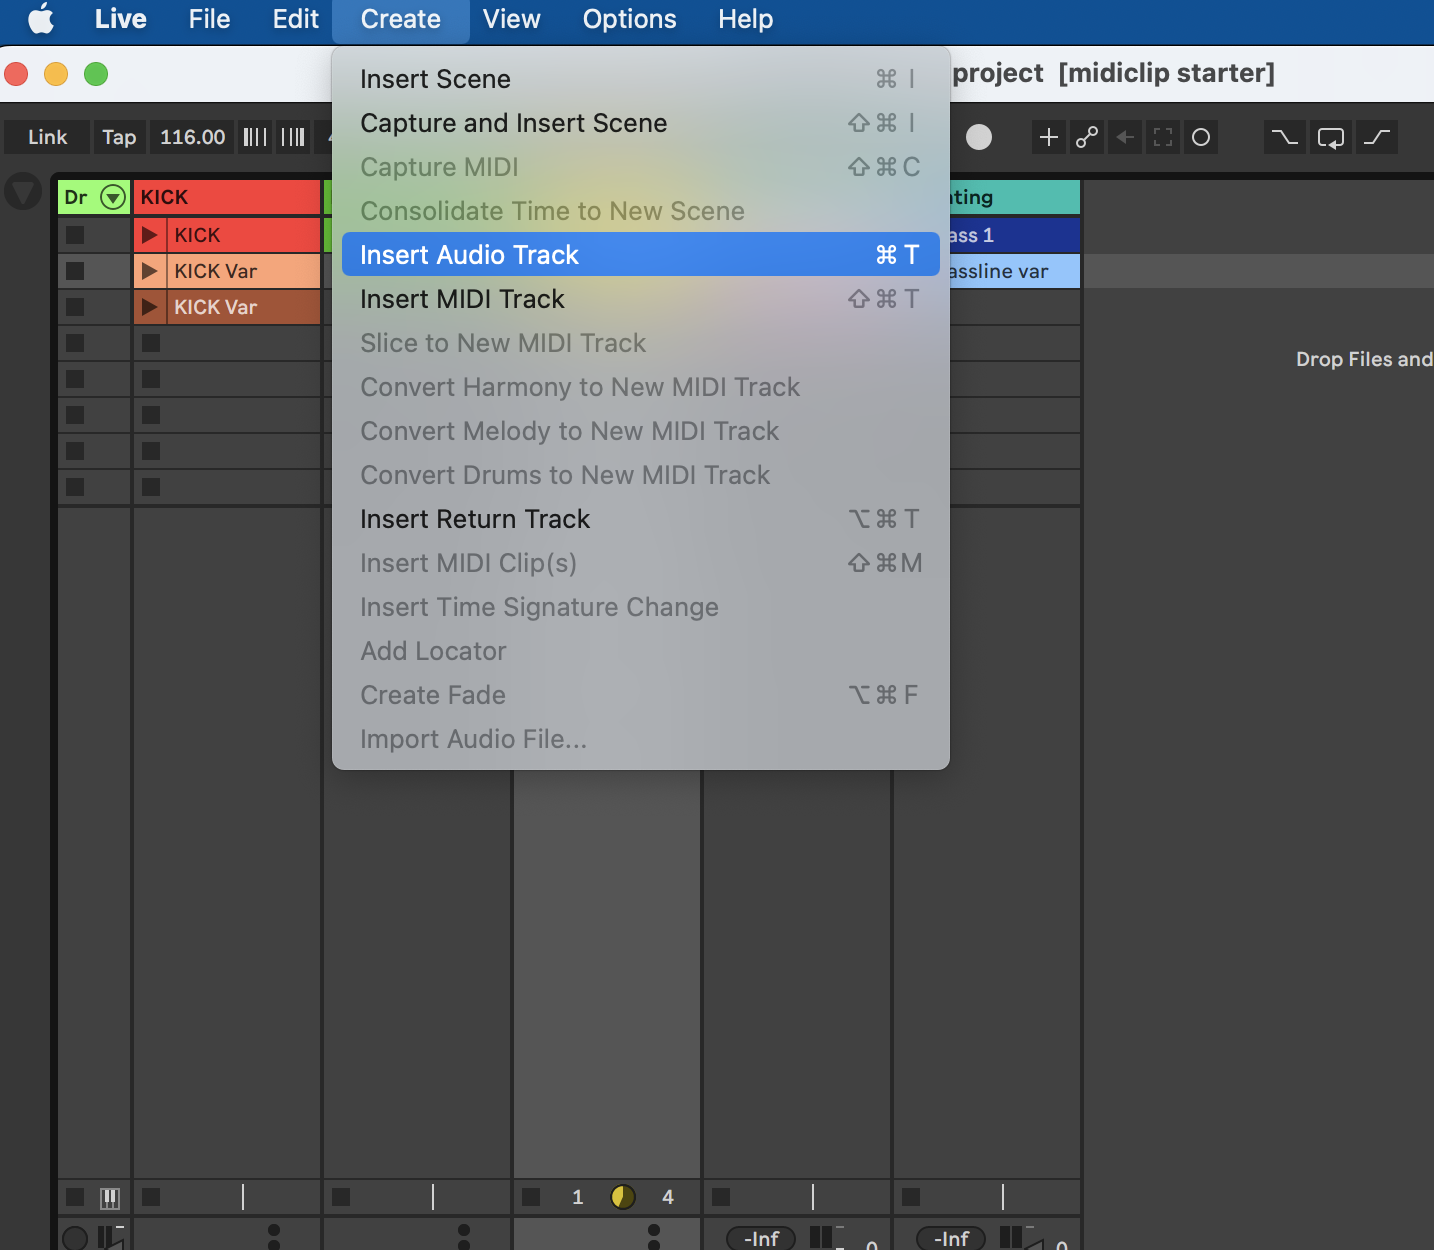
| cmd + T | insert new audio track |
| cmd + shift + T | insert new midi track |
| cmd + shift + M | insert new midi clip (over selected range) |
| 0 | deactivate clips |
| <- -> | works on loop bar and clips |
| cmd + I | insert time (+ shift for delete) with range selected or single point for menu |
| cmd + 1 | narrow grid |
| cmd + 2 | wide grid |
| cmd + 3 | enable triplets |
| cmd + 4 | turn grid off |
| cmd + J | consolidate clips |
| cmd + E | split clips |
| cmd + D | duplicate clips |
| cmd + G | group track & devices |
| cmd + shift + R | export |
| Shortcut | Description |
|---|---|
| shift + space | continue playback |
| Shortcut | Description |
|---|---|
| H | show all tracks & midi in heigth (also toggle back to previous state) |
| W | same for width |
| Z | zoom into selection |
| X | zoom out |
| + / - | zoom in & out (hold alt for height) REDEFINED |
| cmd + . - | |
| S | solo tracks |
| U | fold/unfold tracks |
| alt + U | fold/unfold all tracks |
| <- -> | navigate the arrangement |
| TRACKPAD | for zooming! |
Kuhn, W., & Hein, E. (2021). Electronic Music School: A Contemporary Approach to Teaching Musical Creativity. Oxford University Press.
Finding them might be obvious but they are often overlooked: